Process
My process starts with conceptualizing; brainstorming a product or idea; what are the the rough backbones; the foundation on which to design. Then, research your product or idea; ask questions and find answers to create a foundation to further bring the product or idea to life. Next, ideate and iterate. This is where you begin to start designing; whether its rough logos or an ad campaign or packaging or anything else. Which brings you into implementation. What is the final look of the product or idea? How is this product shown in a variety of mediums (website, packaging, branding, ad campaigns, etc) to market to the consumer?
See different parts of the process for five design projects below.
1. Conceptualize
Create a product concept and pitch it
Create a product that does not already exist. To eating chips and salsa to create Social Situations Salsa, from being inspired by fun facts on Buzzfeed like Groups Unknown Association Awareness Magazine, design inspiration is everywhere. Once you have your product idea, create a brief which includes a description, message, objective, problem, audience, and research. Which leads us to step 2.
2. Research
Research your product and ask questions
What is the product? What are the competitors? Who is the primary, secondary, and tertiary audience for this product? Ask questions to create the backbone of the product and start designing.
3. Ideation and Iteration
Create 100 ideas, simplify to 10, then choose 1
Create as many design concept directions as possible, using the mind mapping technique and organizing word banks. Come up with ideas and create many variations of those ideas. In this stage you should have a defined product concept to ideate and iterate the brand identity, the naming (product name, descriptor for the product, and the tagline), logos, product designs (labels, boxes, etc), and ad campaigns, then implement the brand into means in step 4.
4. Implement
Make the brand and the product come to life
Through a solidified brand identity created in step 3, think about how the brand can extend beyond its package and ad campaign. Means are objects that are branded, such as stickers, clothing, web presence and more. Making means, such as the flight tray for John Adams Cider or the Super Natural Seaweed Puff Snack carry on exploring tote bag will make your brand will look established and realistic. A variety of mediums will allow you to market to consumers.
Process of a Project
Take a look into creating Bluebell Sustainable Adhesive
1. Conceptualize
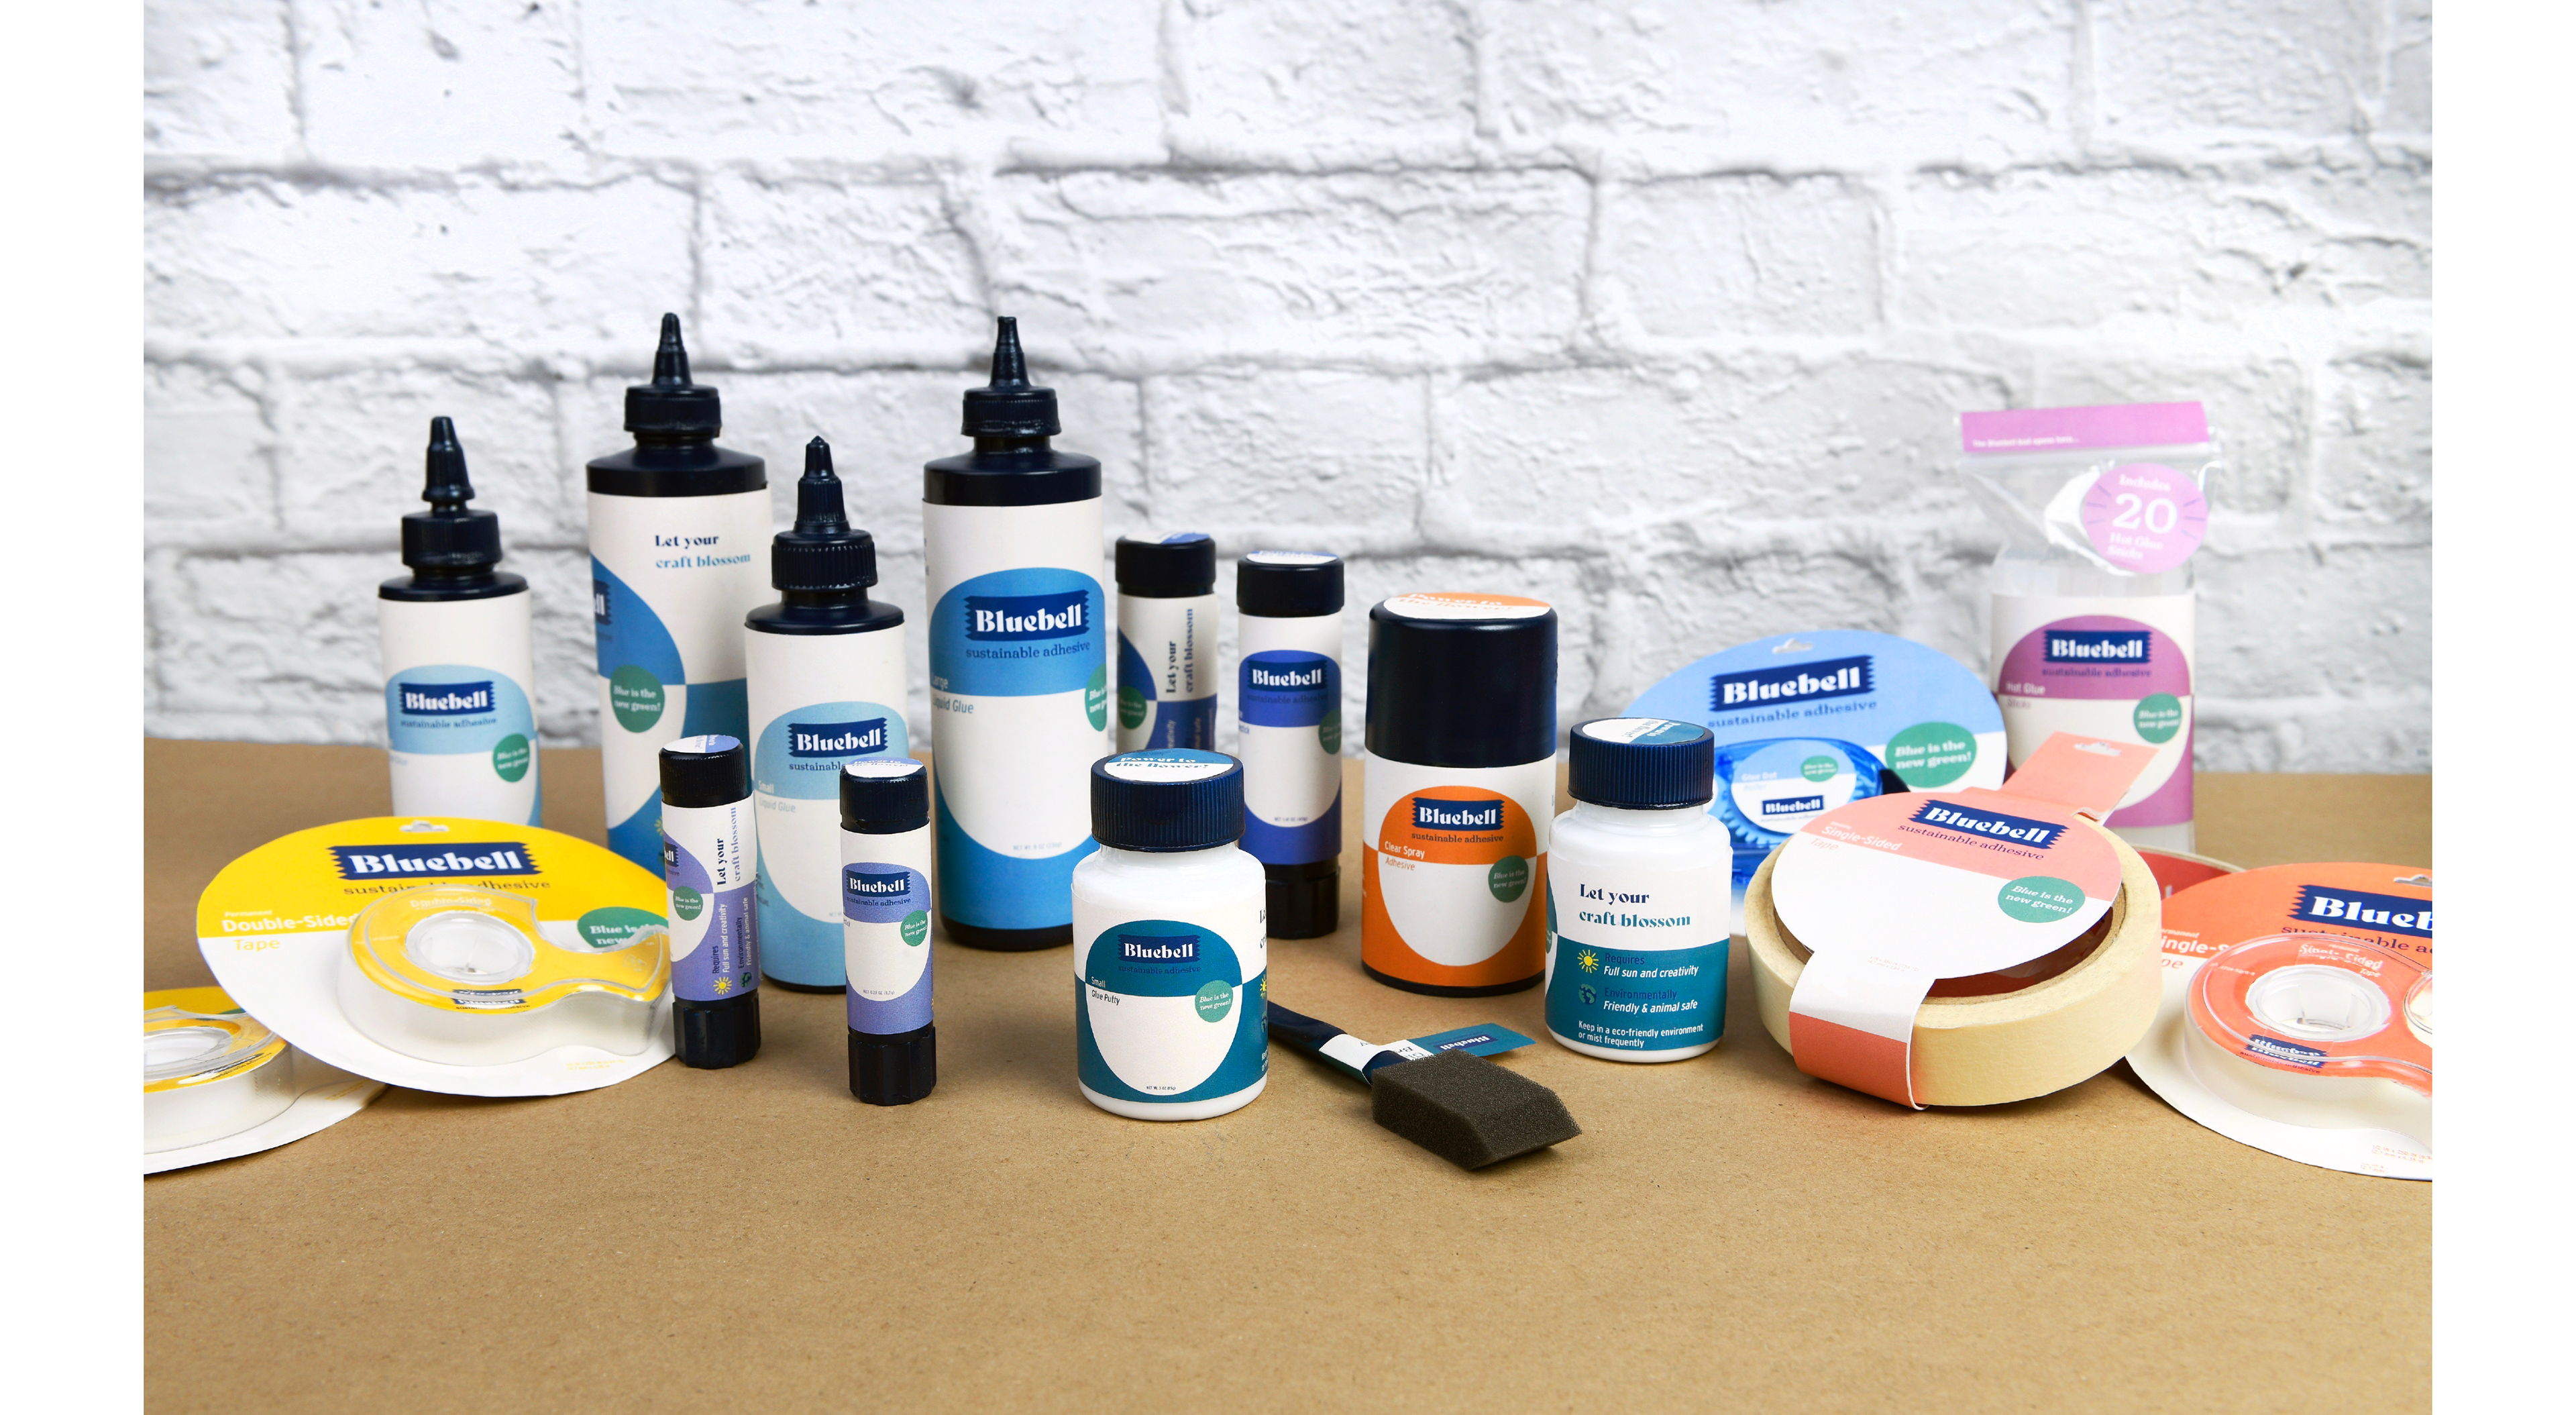
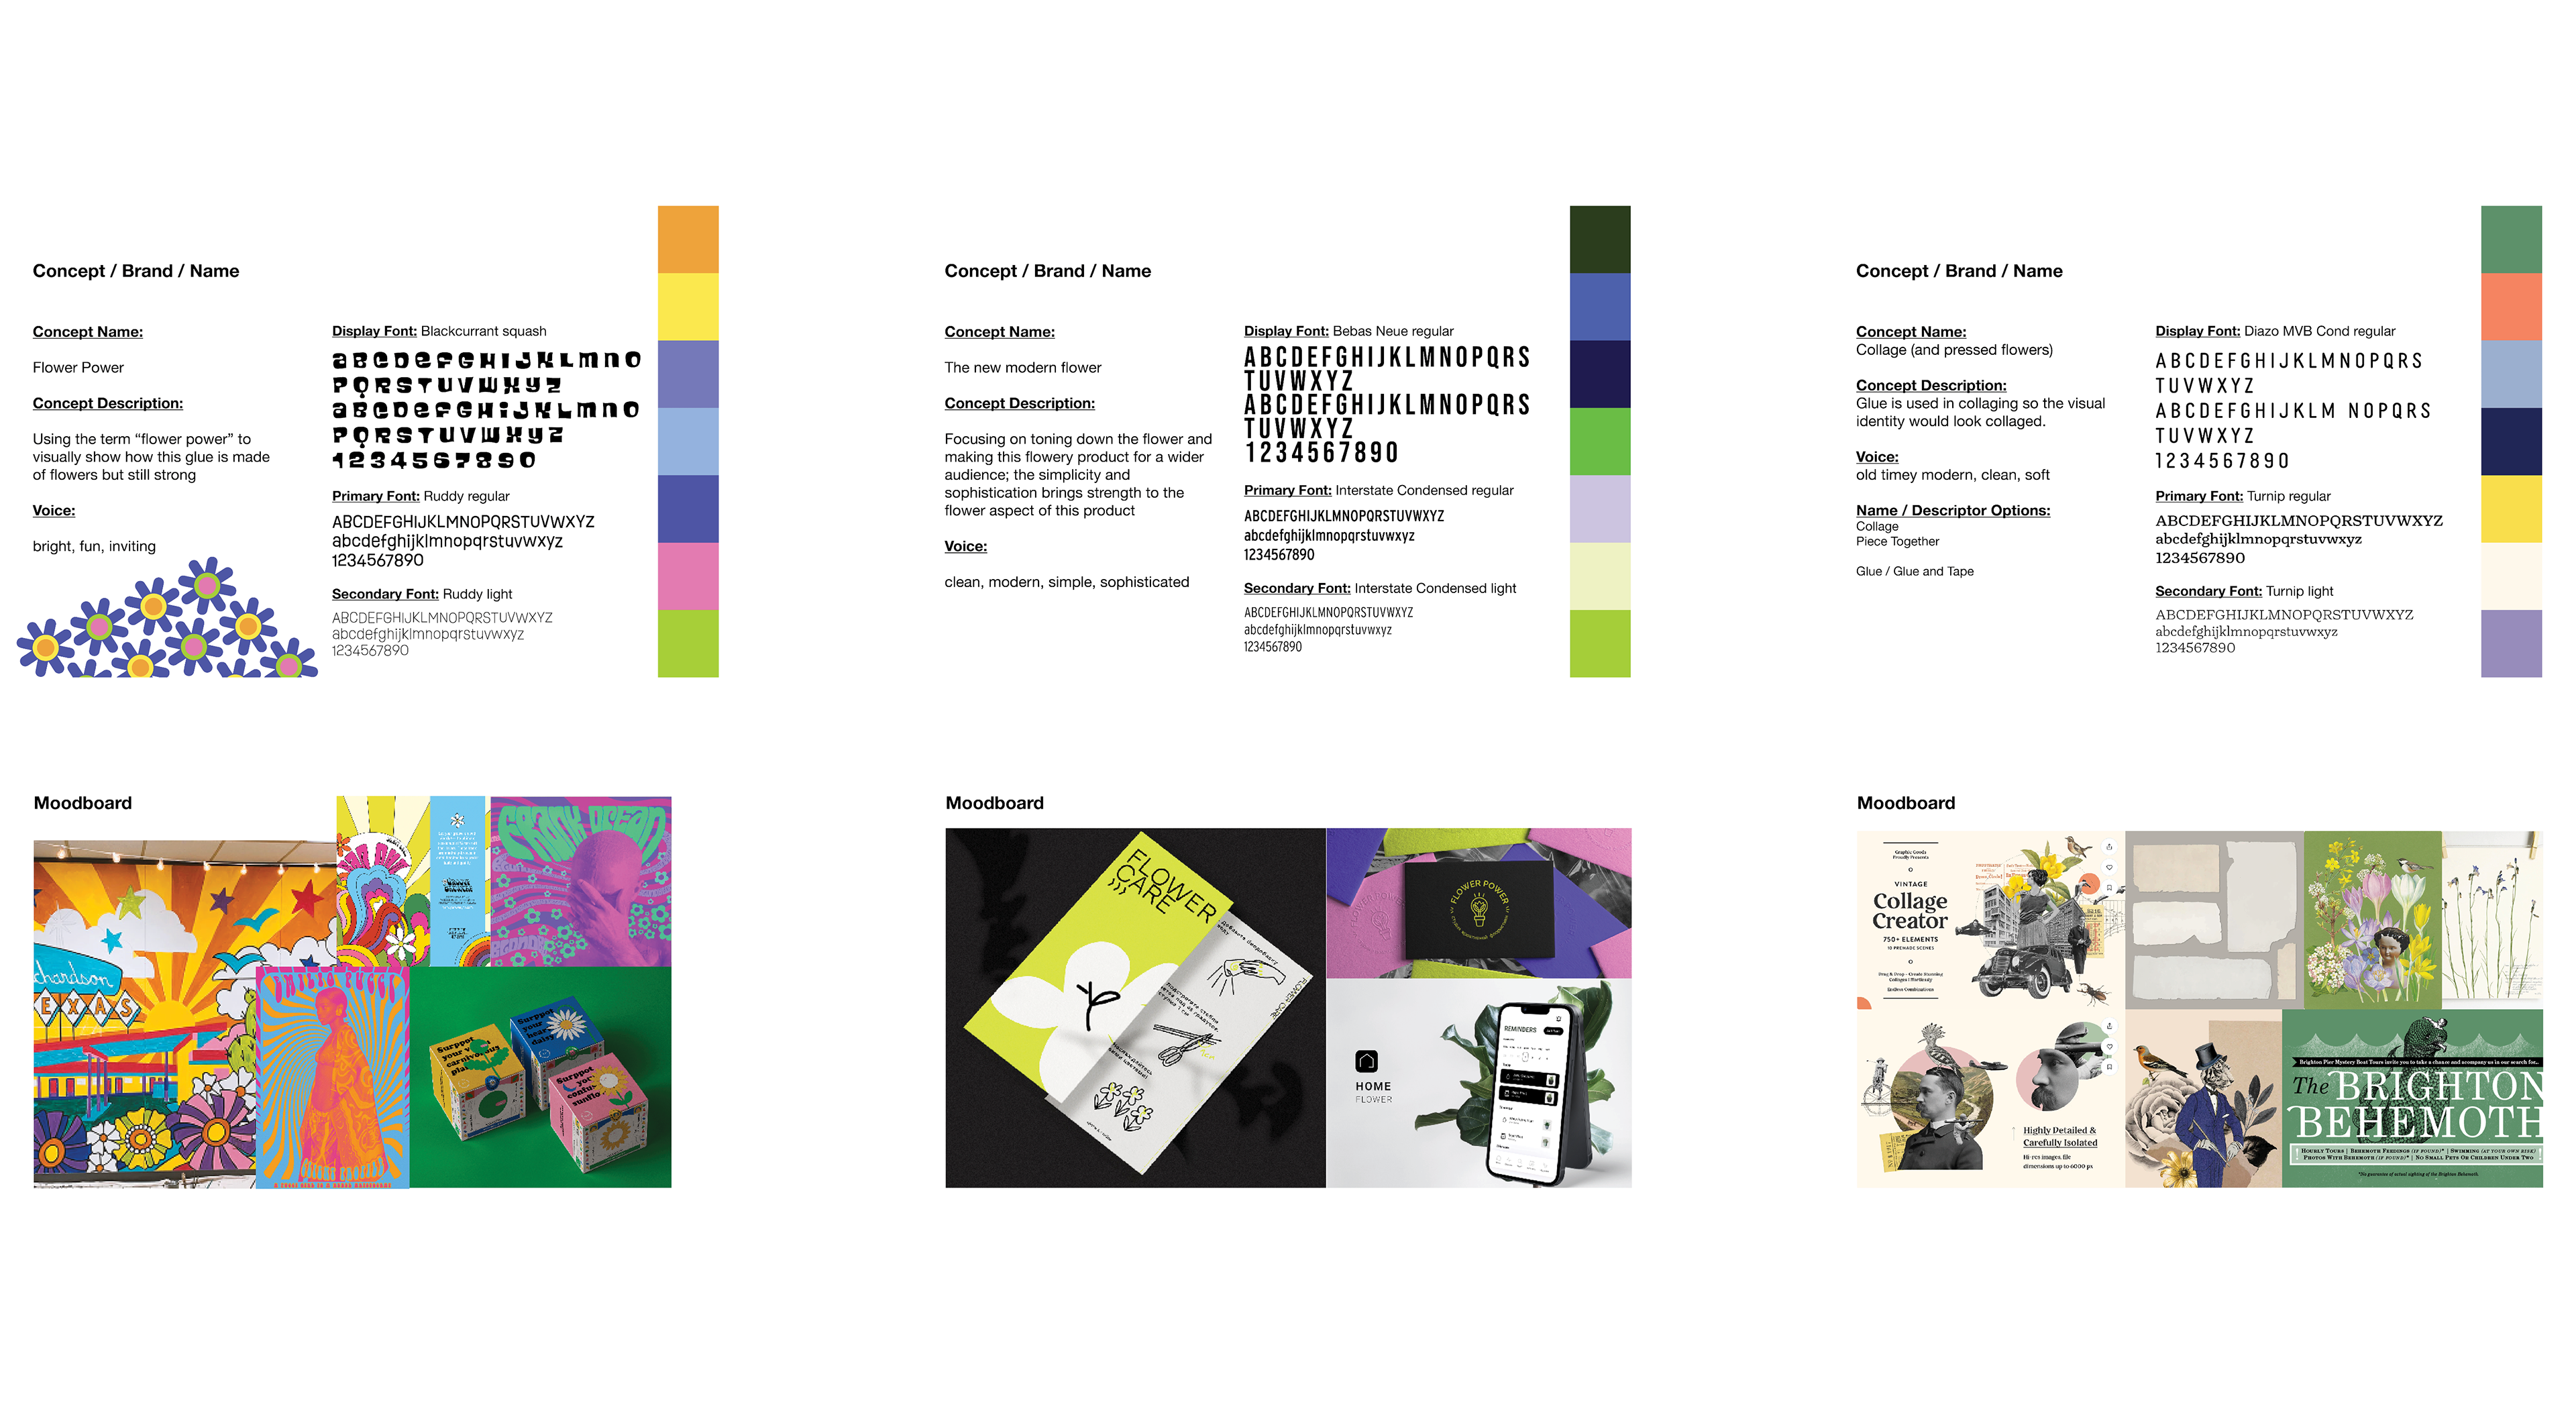
To get inspired for product concepts, I will sometimes go onto Buzzfeed and read fun facts. Did you know bluebell flowers were historically used to make glue? I wanted to have this project to be a product line where I could make all different sizes and shapes of packaging. So I created the concept of Bluebell which is an adhesive line of glues and tapes that are made from bluebell flowers.
2. Research
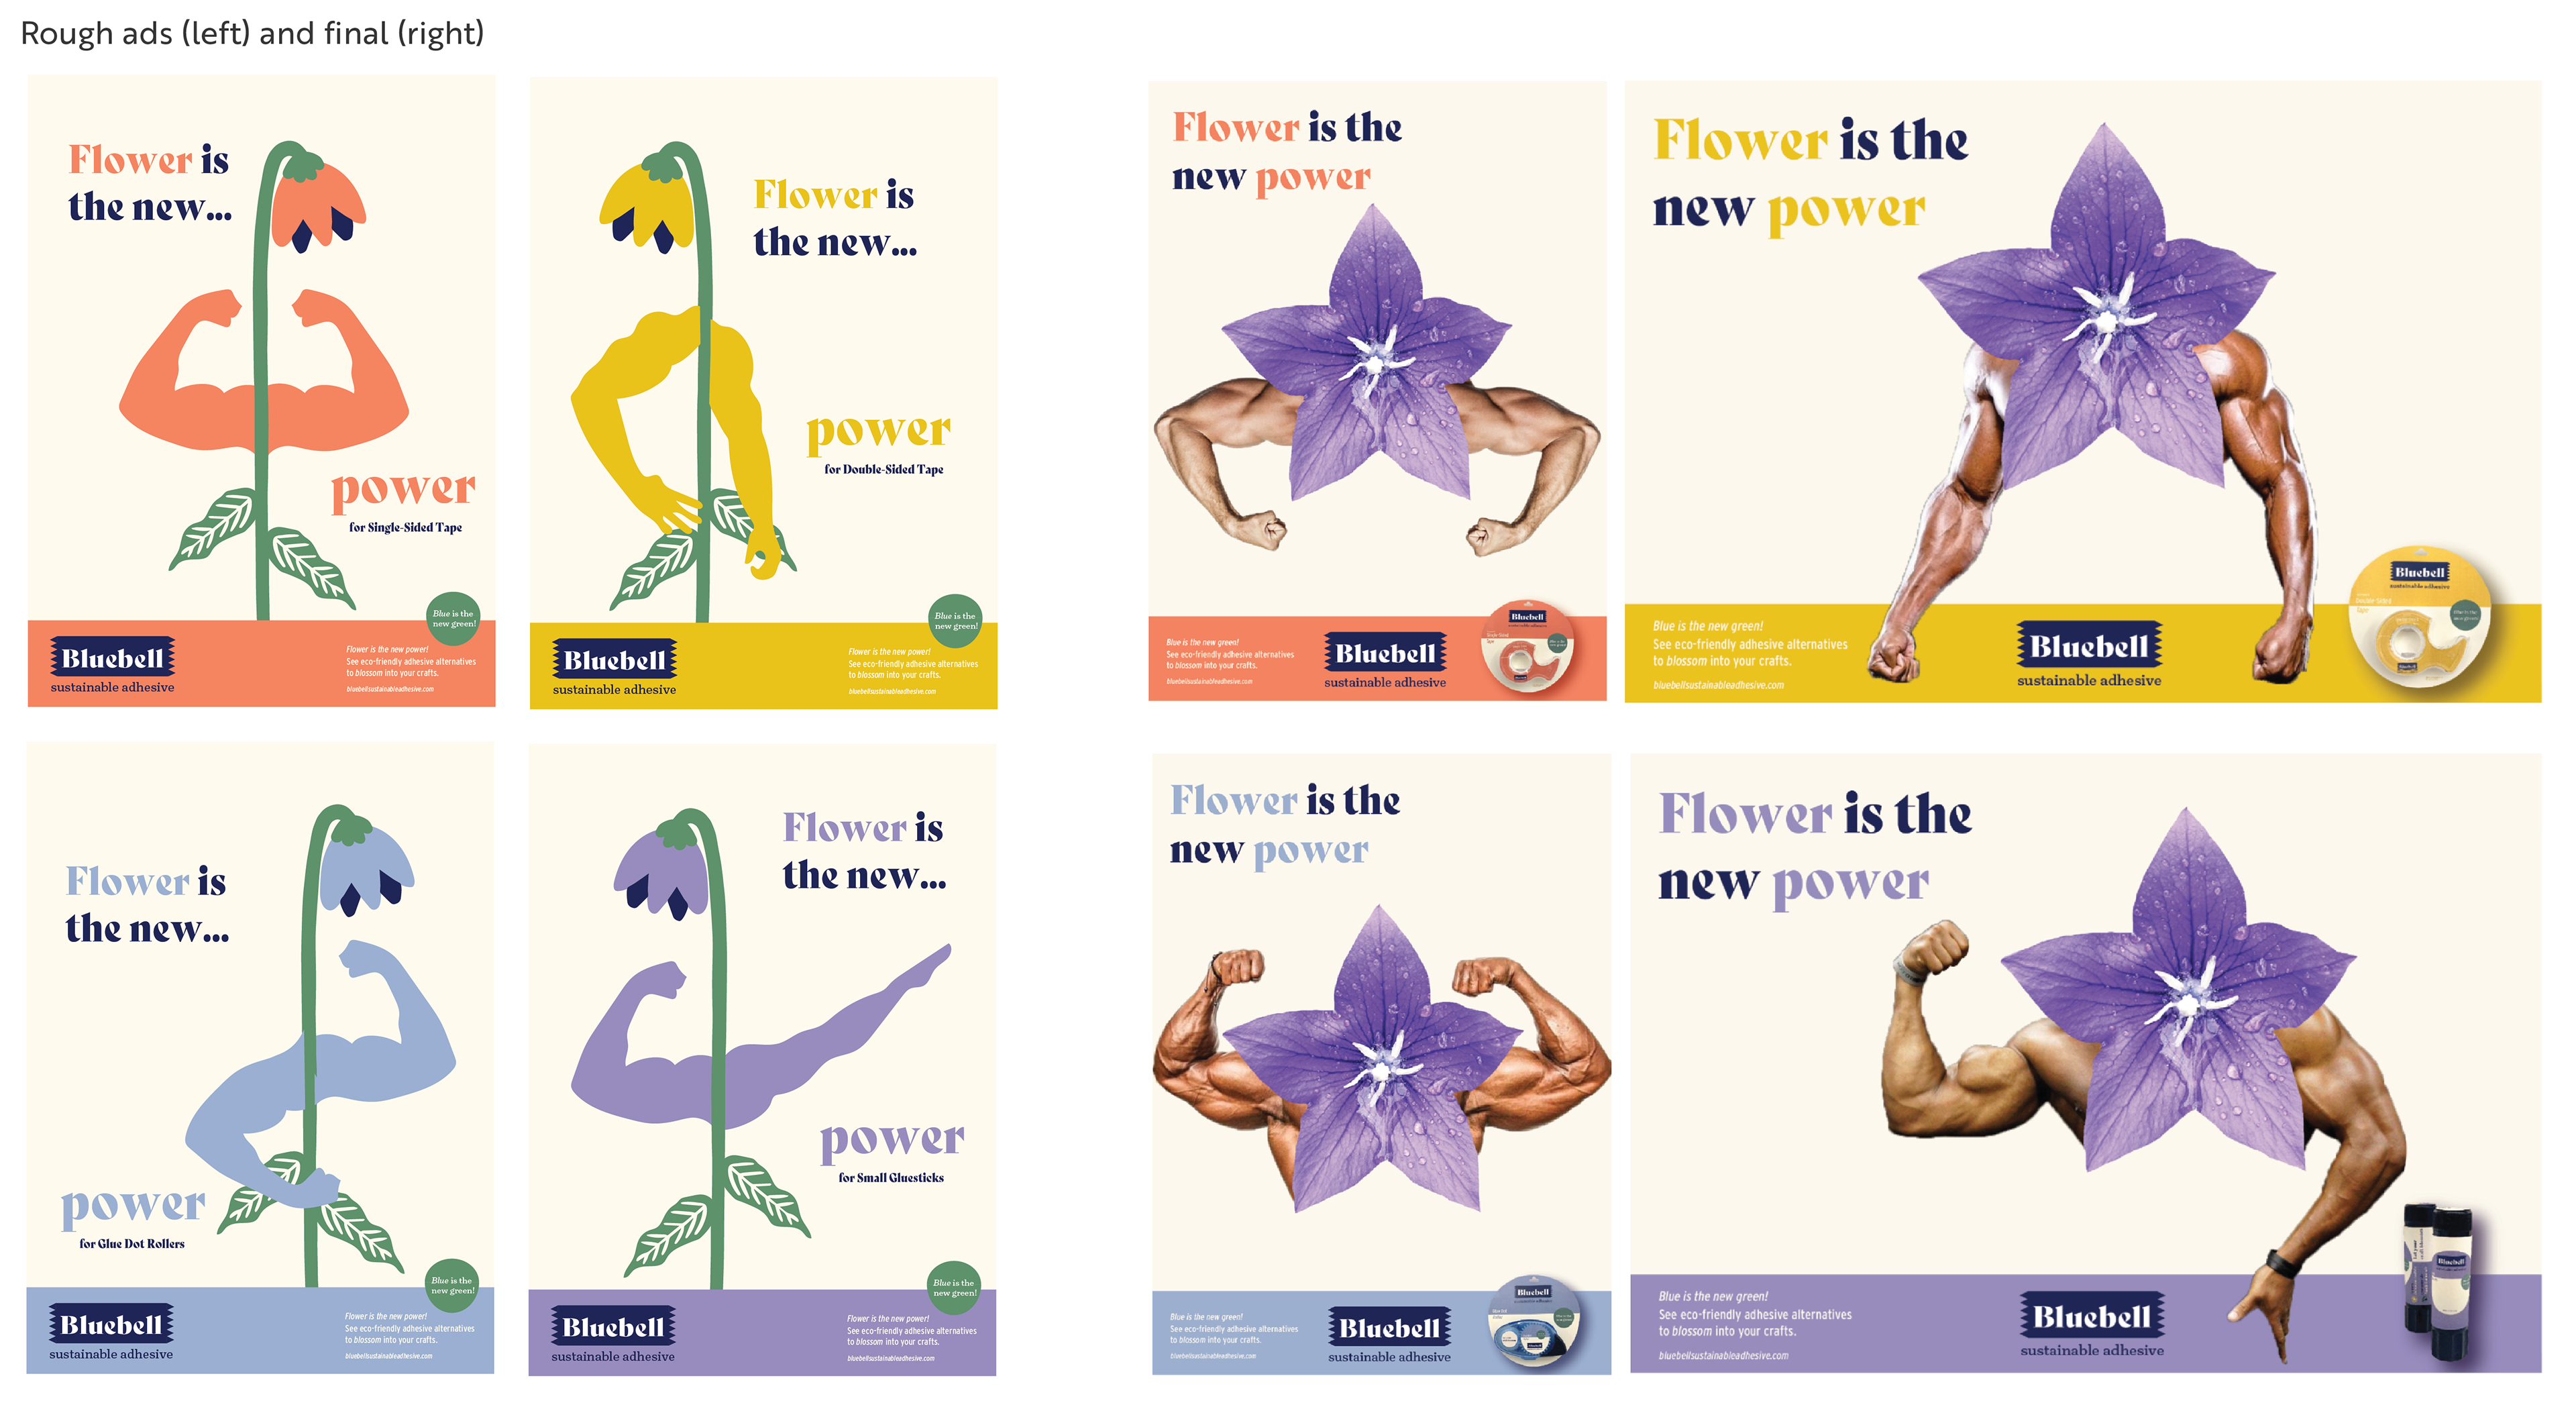
I researched different glue competitors which all had one message: their glue was strong. Gorilla glue is the biggest example of this through their name. Since my adhesive line is made with flowers, I had to show that the glue was strong. Advertising campaigns are a creative way to show benefits without overcrowding the product packaging. I first experimented with illustration, but photography was more useful at grabbing the viewers attention. The left image is the rough advertisements and the right image are the final ads.
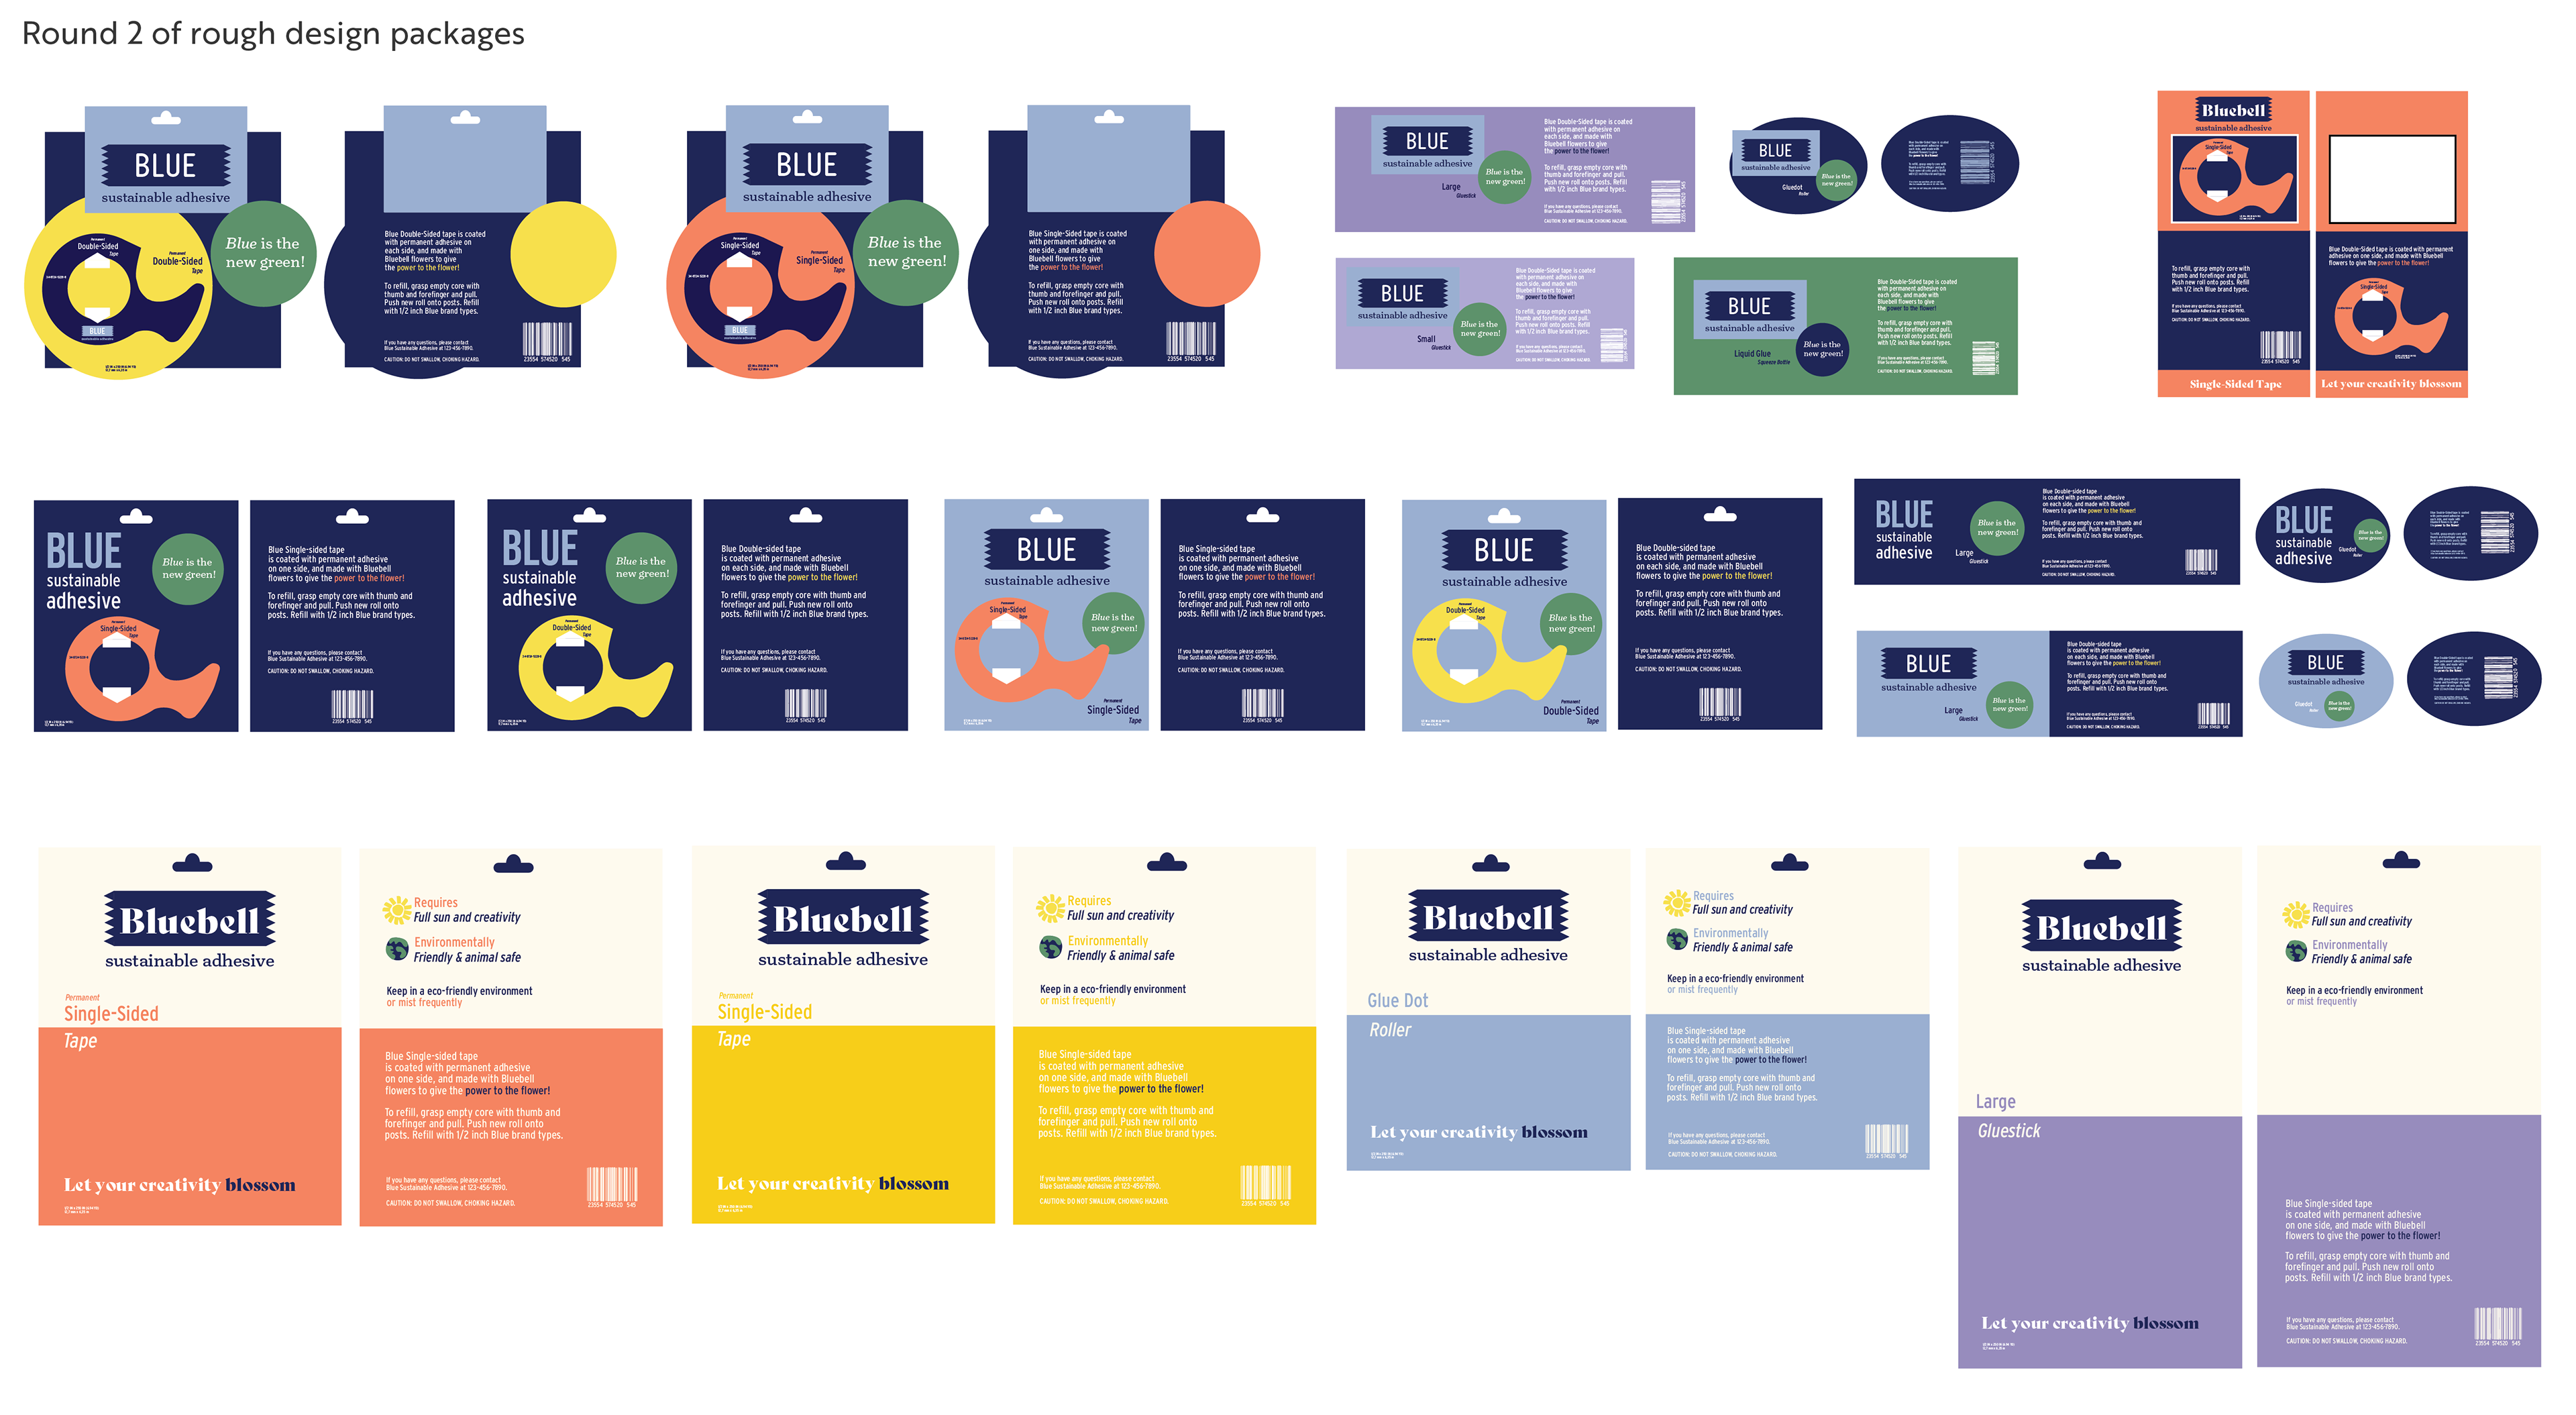
3. Ideation and Iteration
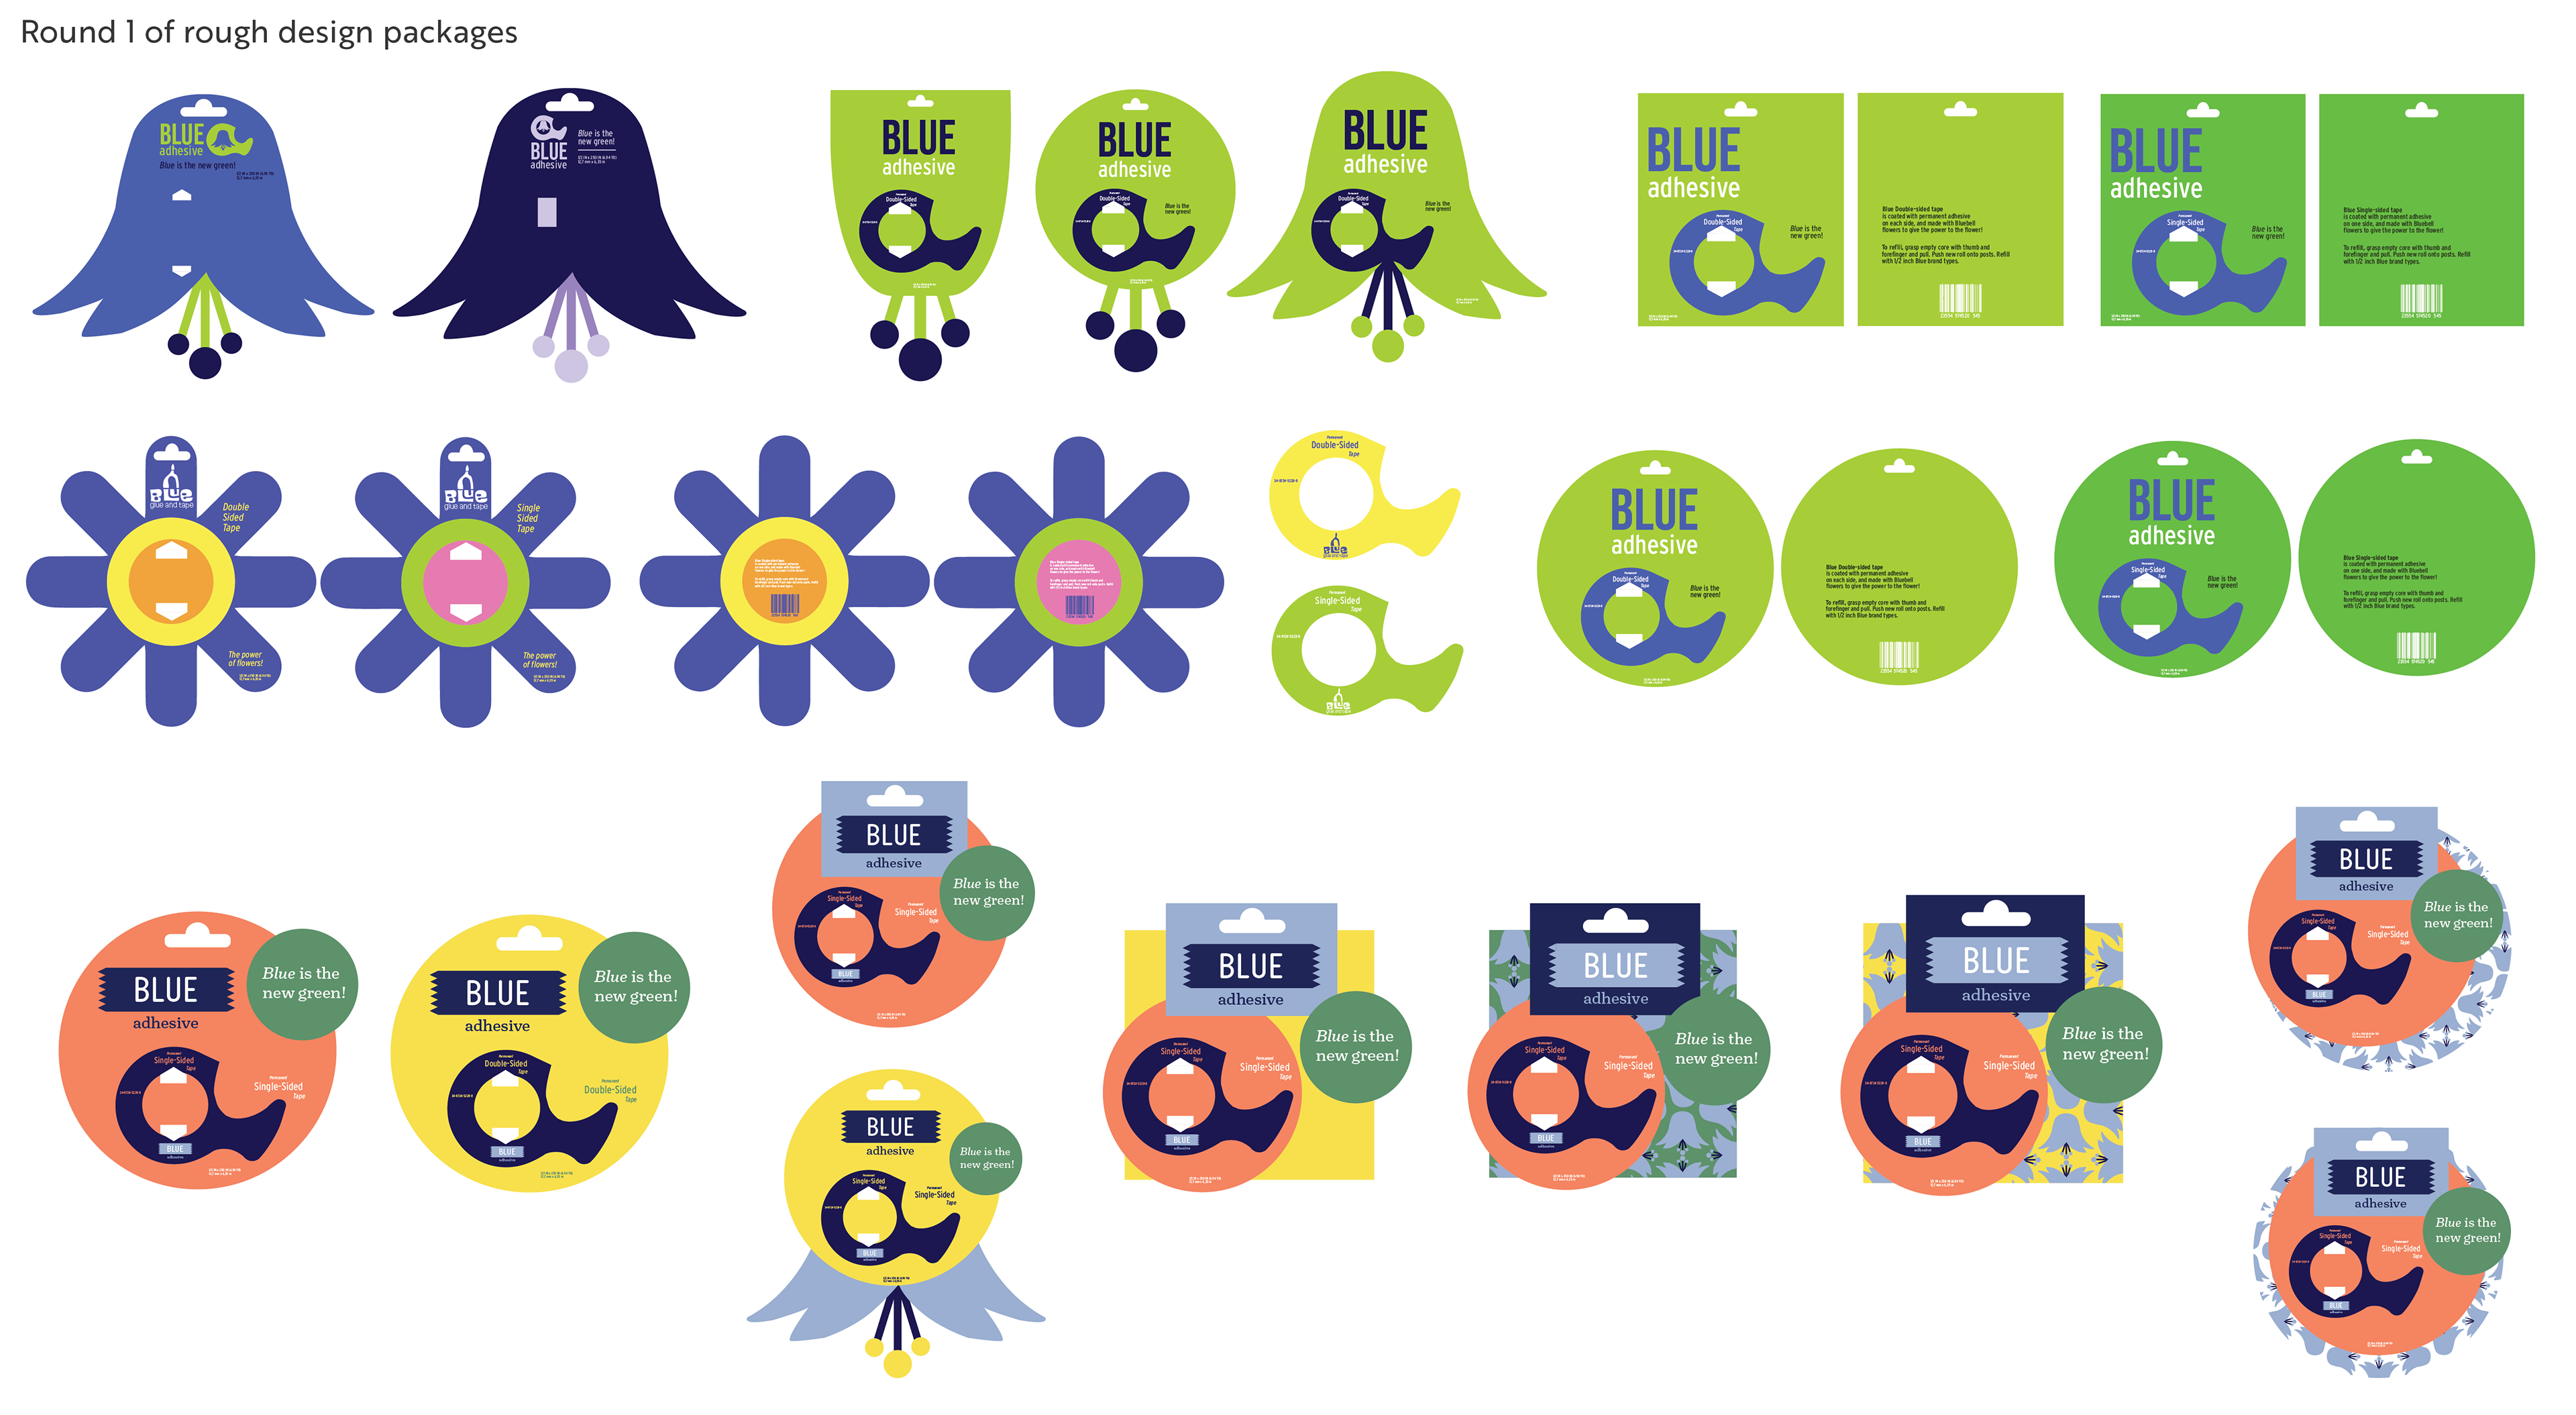
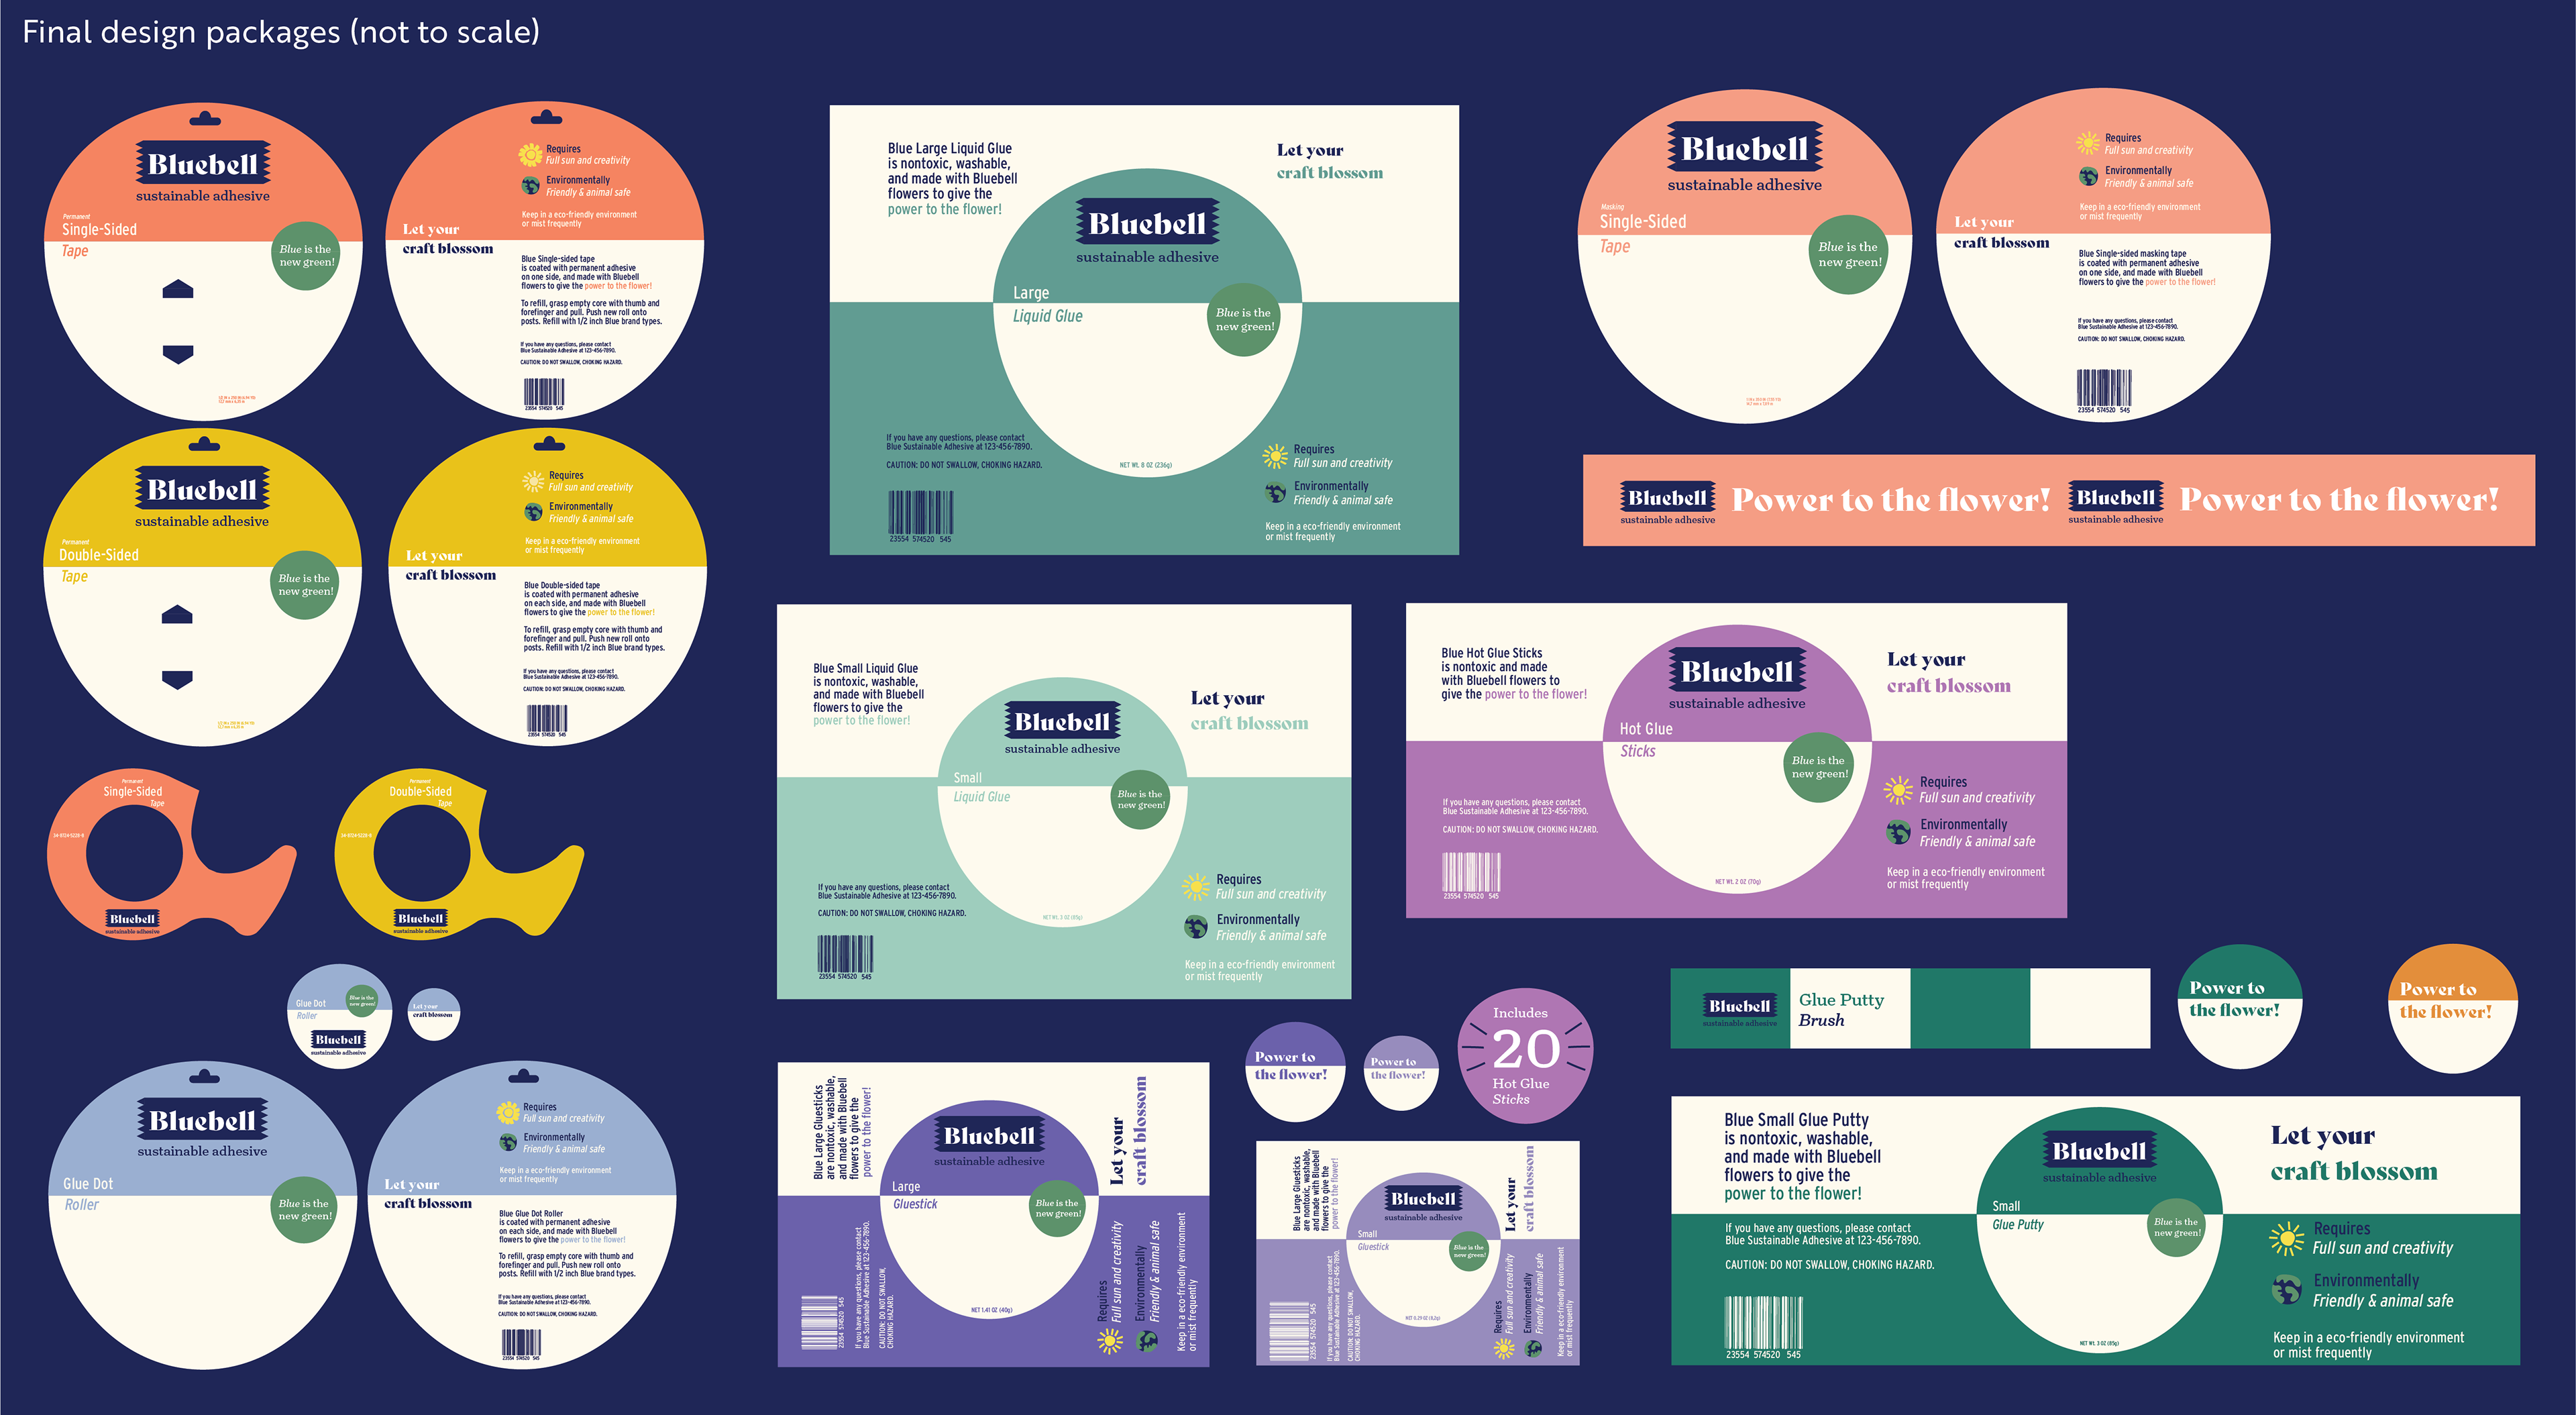
The advertising campaign shows the durability of the adhesives through eye catching imagery which allows the packaging to be minimal, while still showing durability. In the process of creating the packages I experimented a lot, thinking about design 100 options to 10 then choose 1. I meshed the organic quality of the flowers and the clean strong voice together to show how Bluebell is sustainable and strong. The first and second screens are my first and second rounds of roughs and the third screen are my final designs.
4. Implement
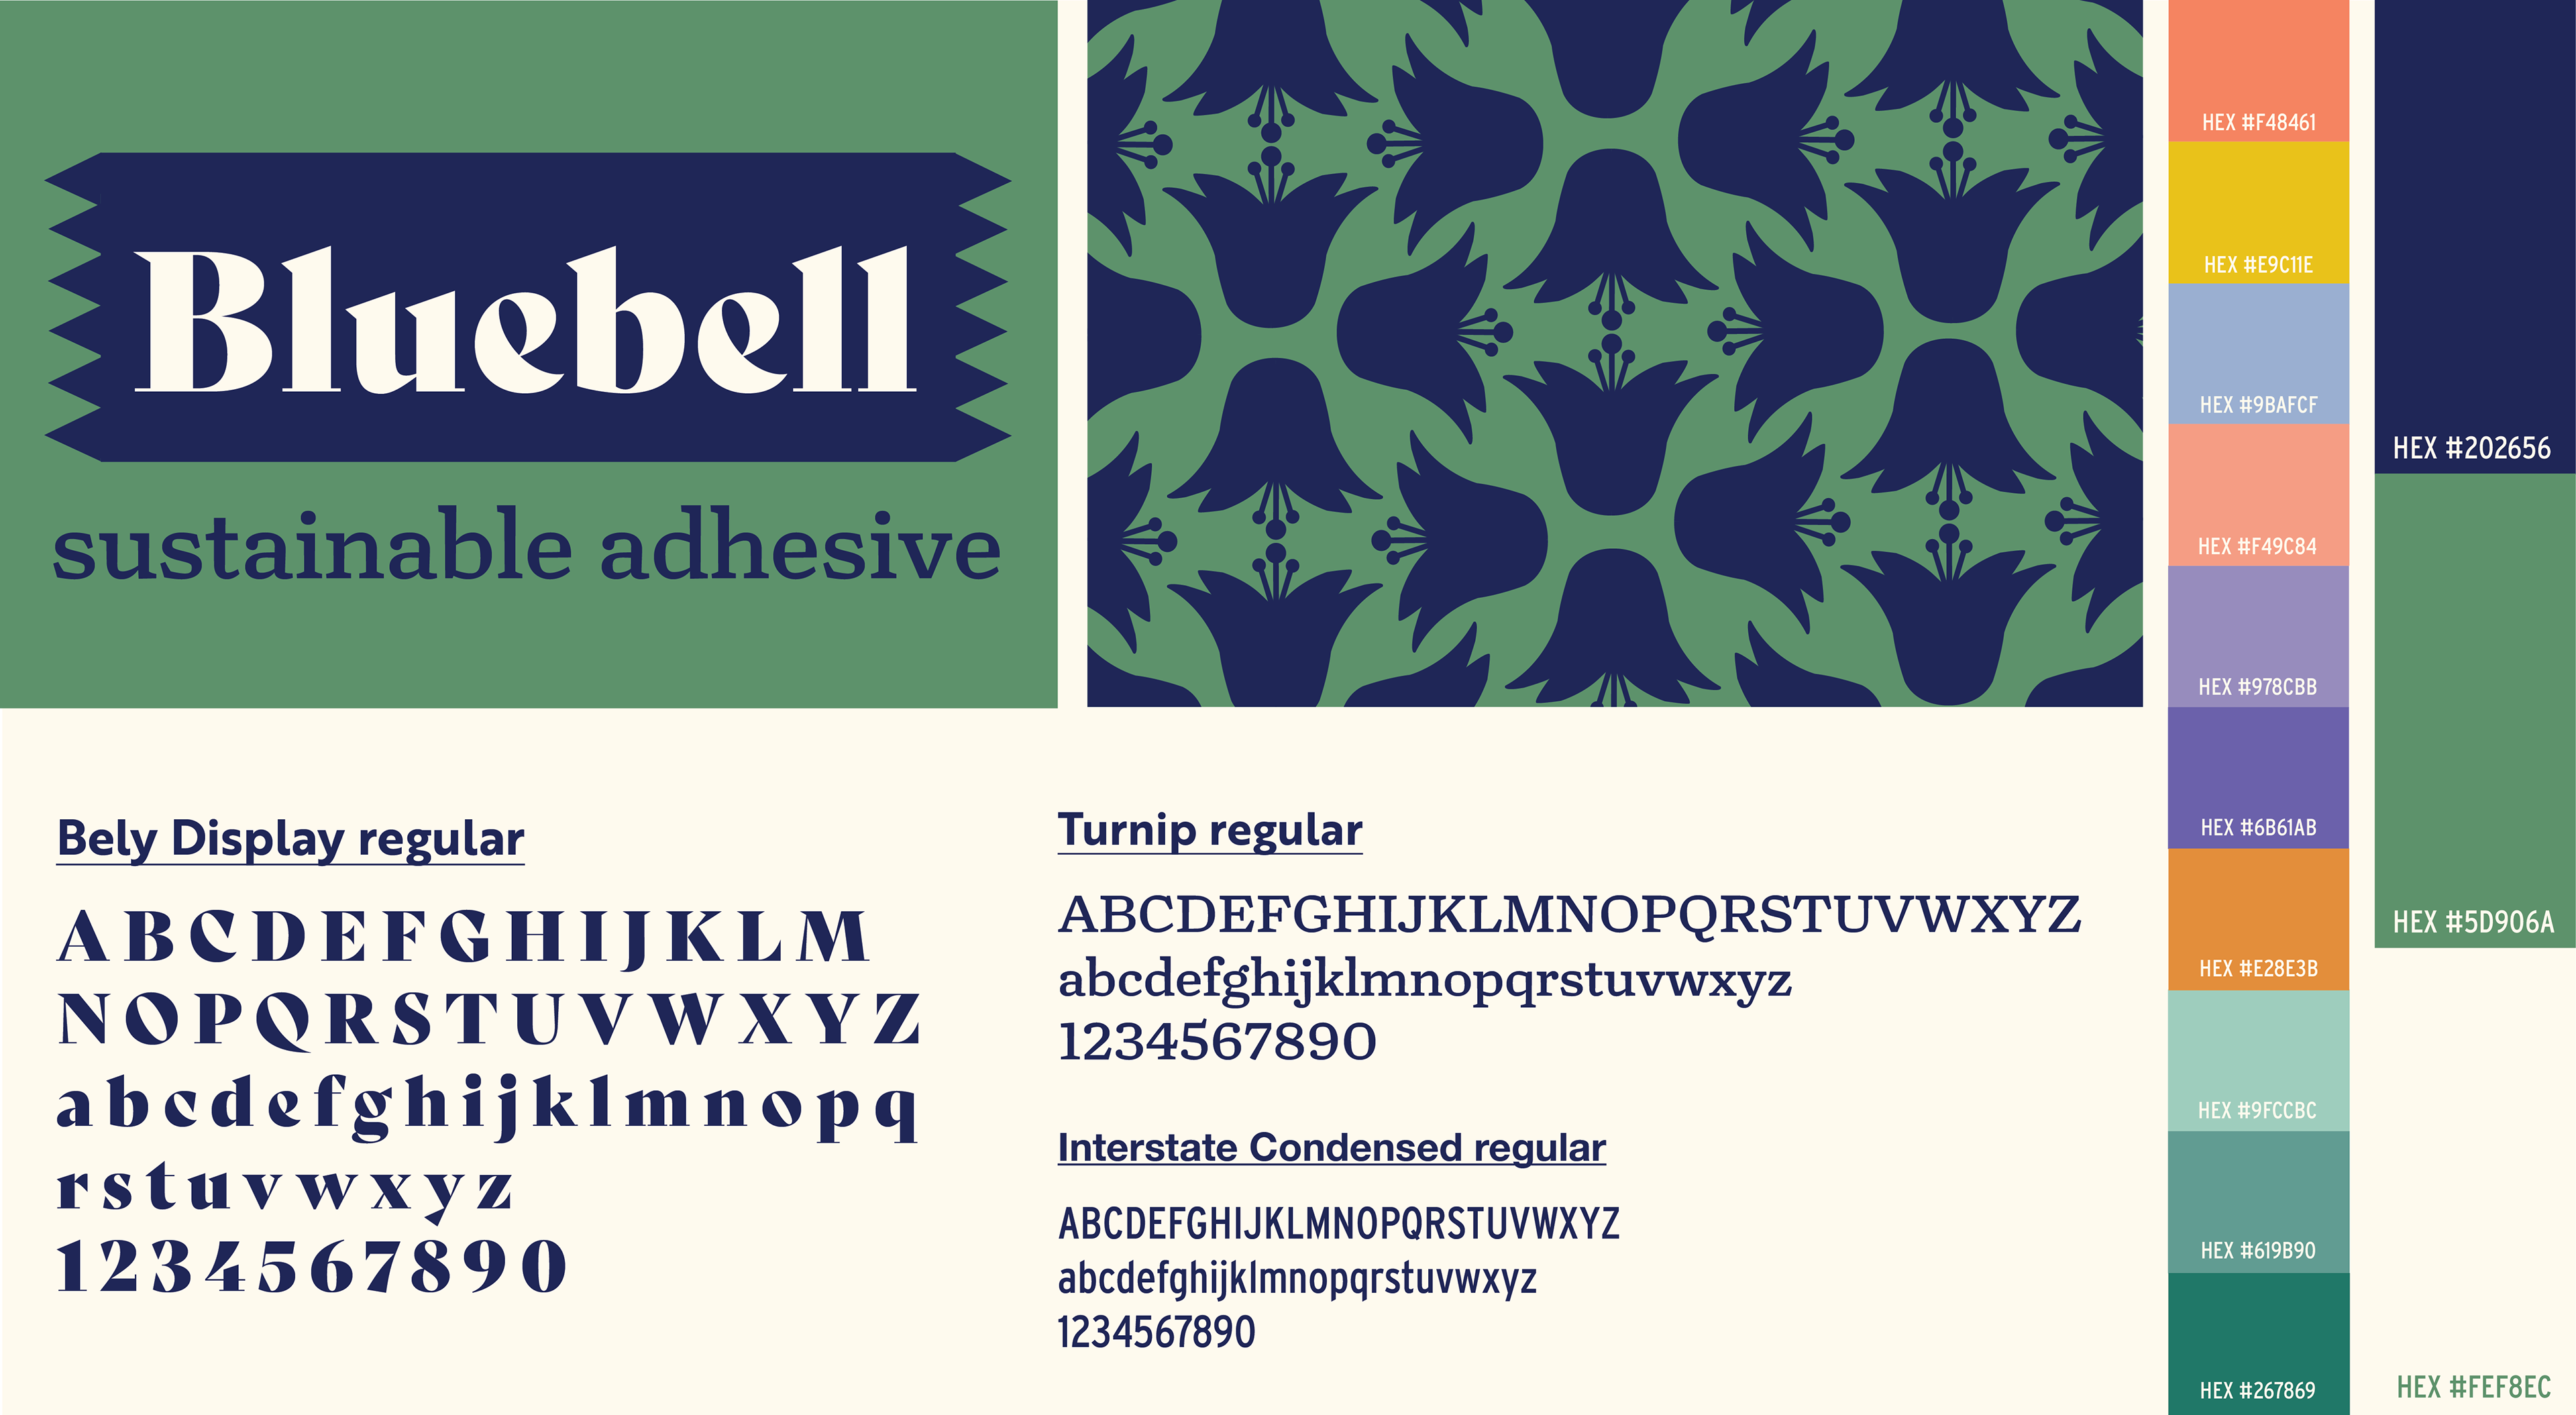
The brand identity evolved through the whole design process. I started out with three design concepts and making a mood board and brand guide for each one, which can be seen in the first image below. The second image below is the final brand guide. After solidifying a brand identity and final package designs, I built a point of purchase (POP) to display and highlight the products. I used the dark blue and green from the brand identity in the POP to make the package labels and the Bluebell typography at the top of the POP stand out. Also, I extended the brand to web design and created a homepage for Bluebell.
Process of a Project
Take a quick look into creating Super Natural Seaweed Puff Snack
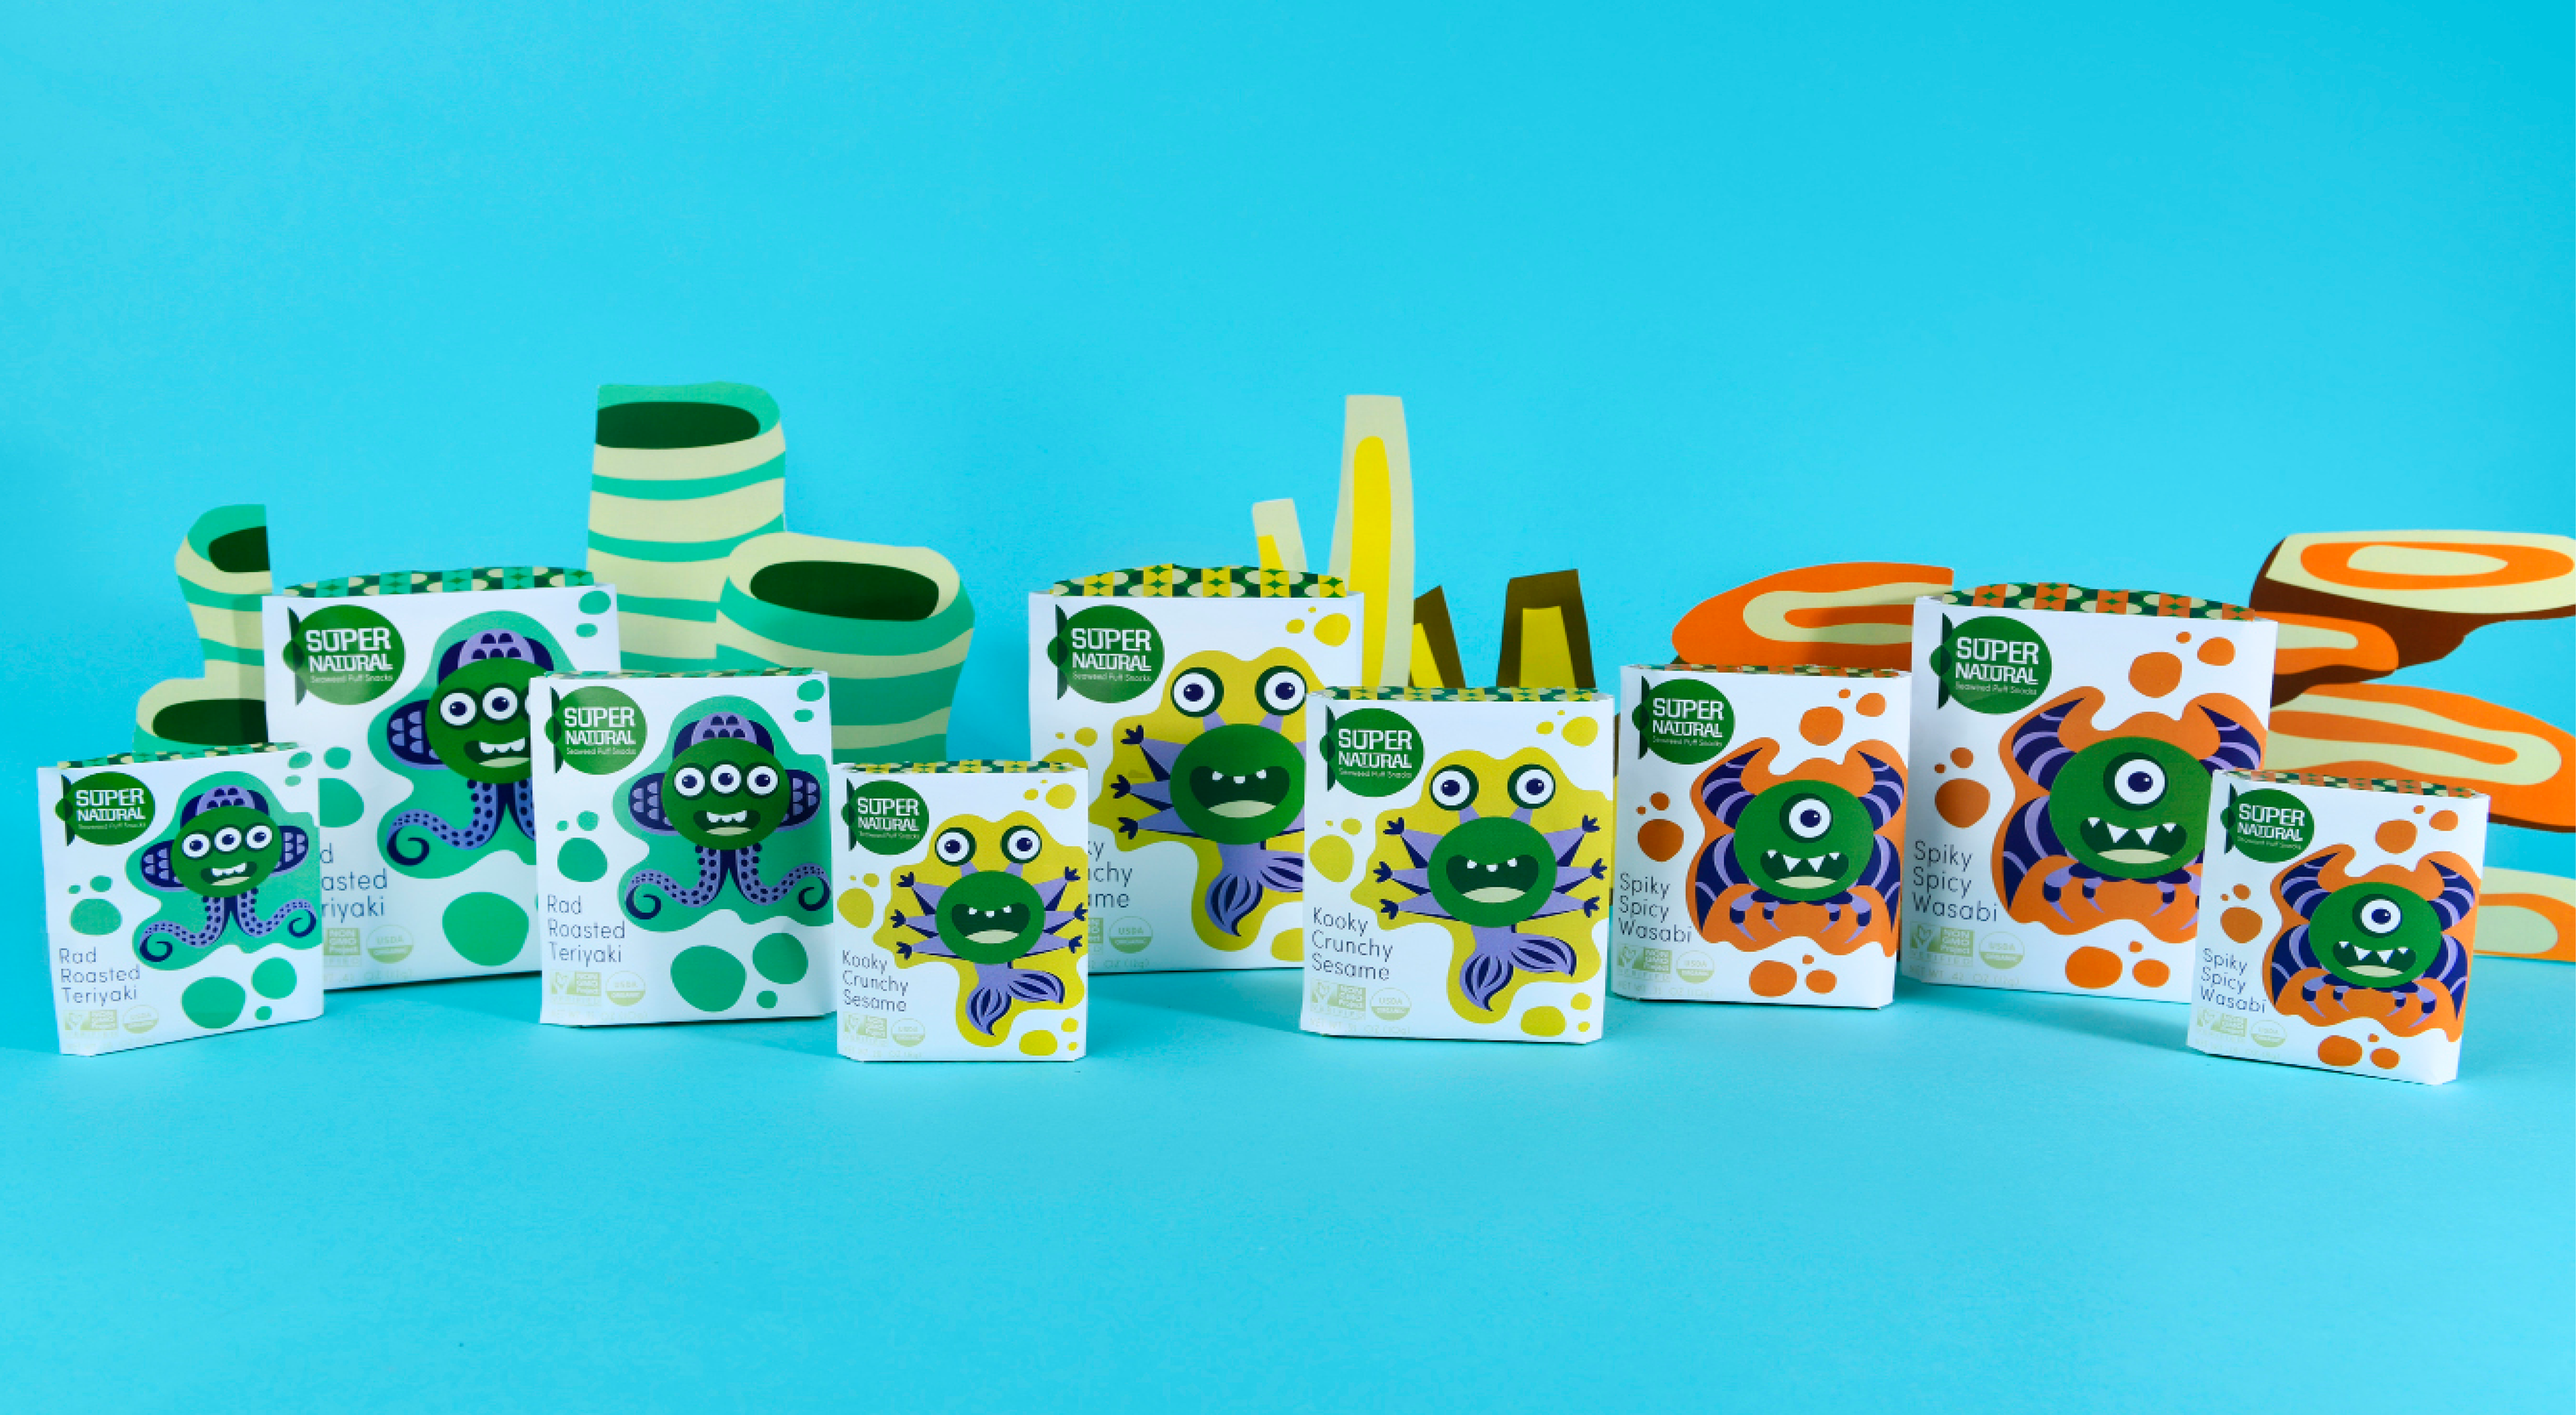
A Quick Glimpse of Ideation and Iteration: Package design and logo creation.
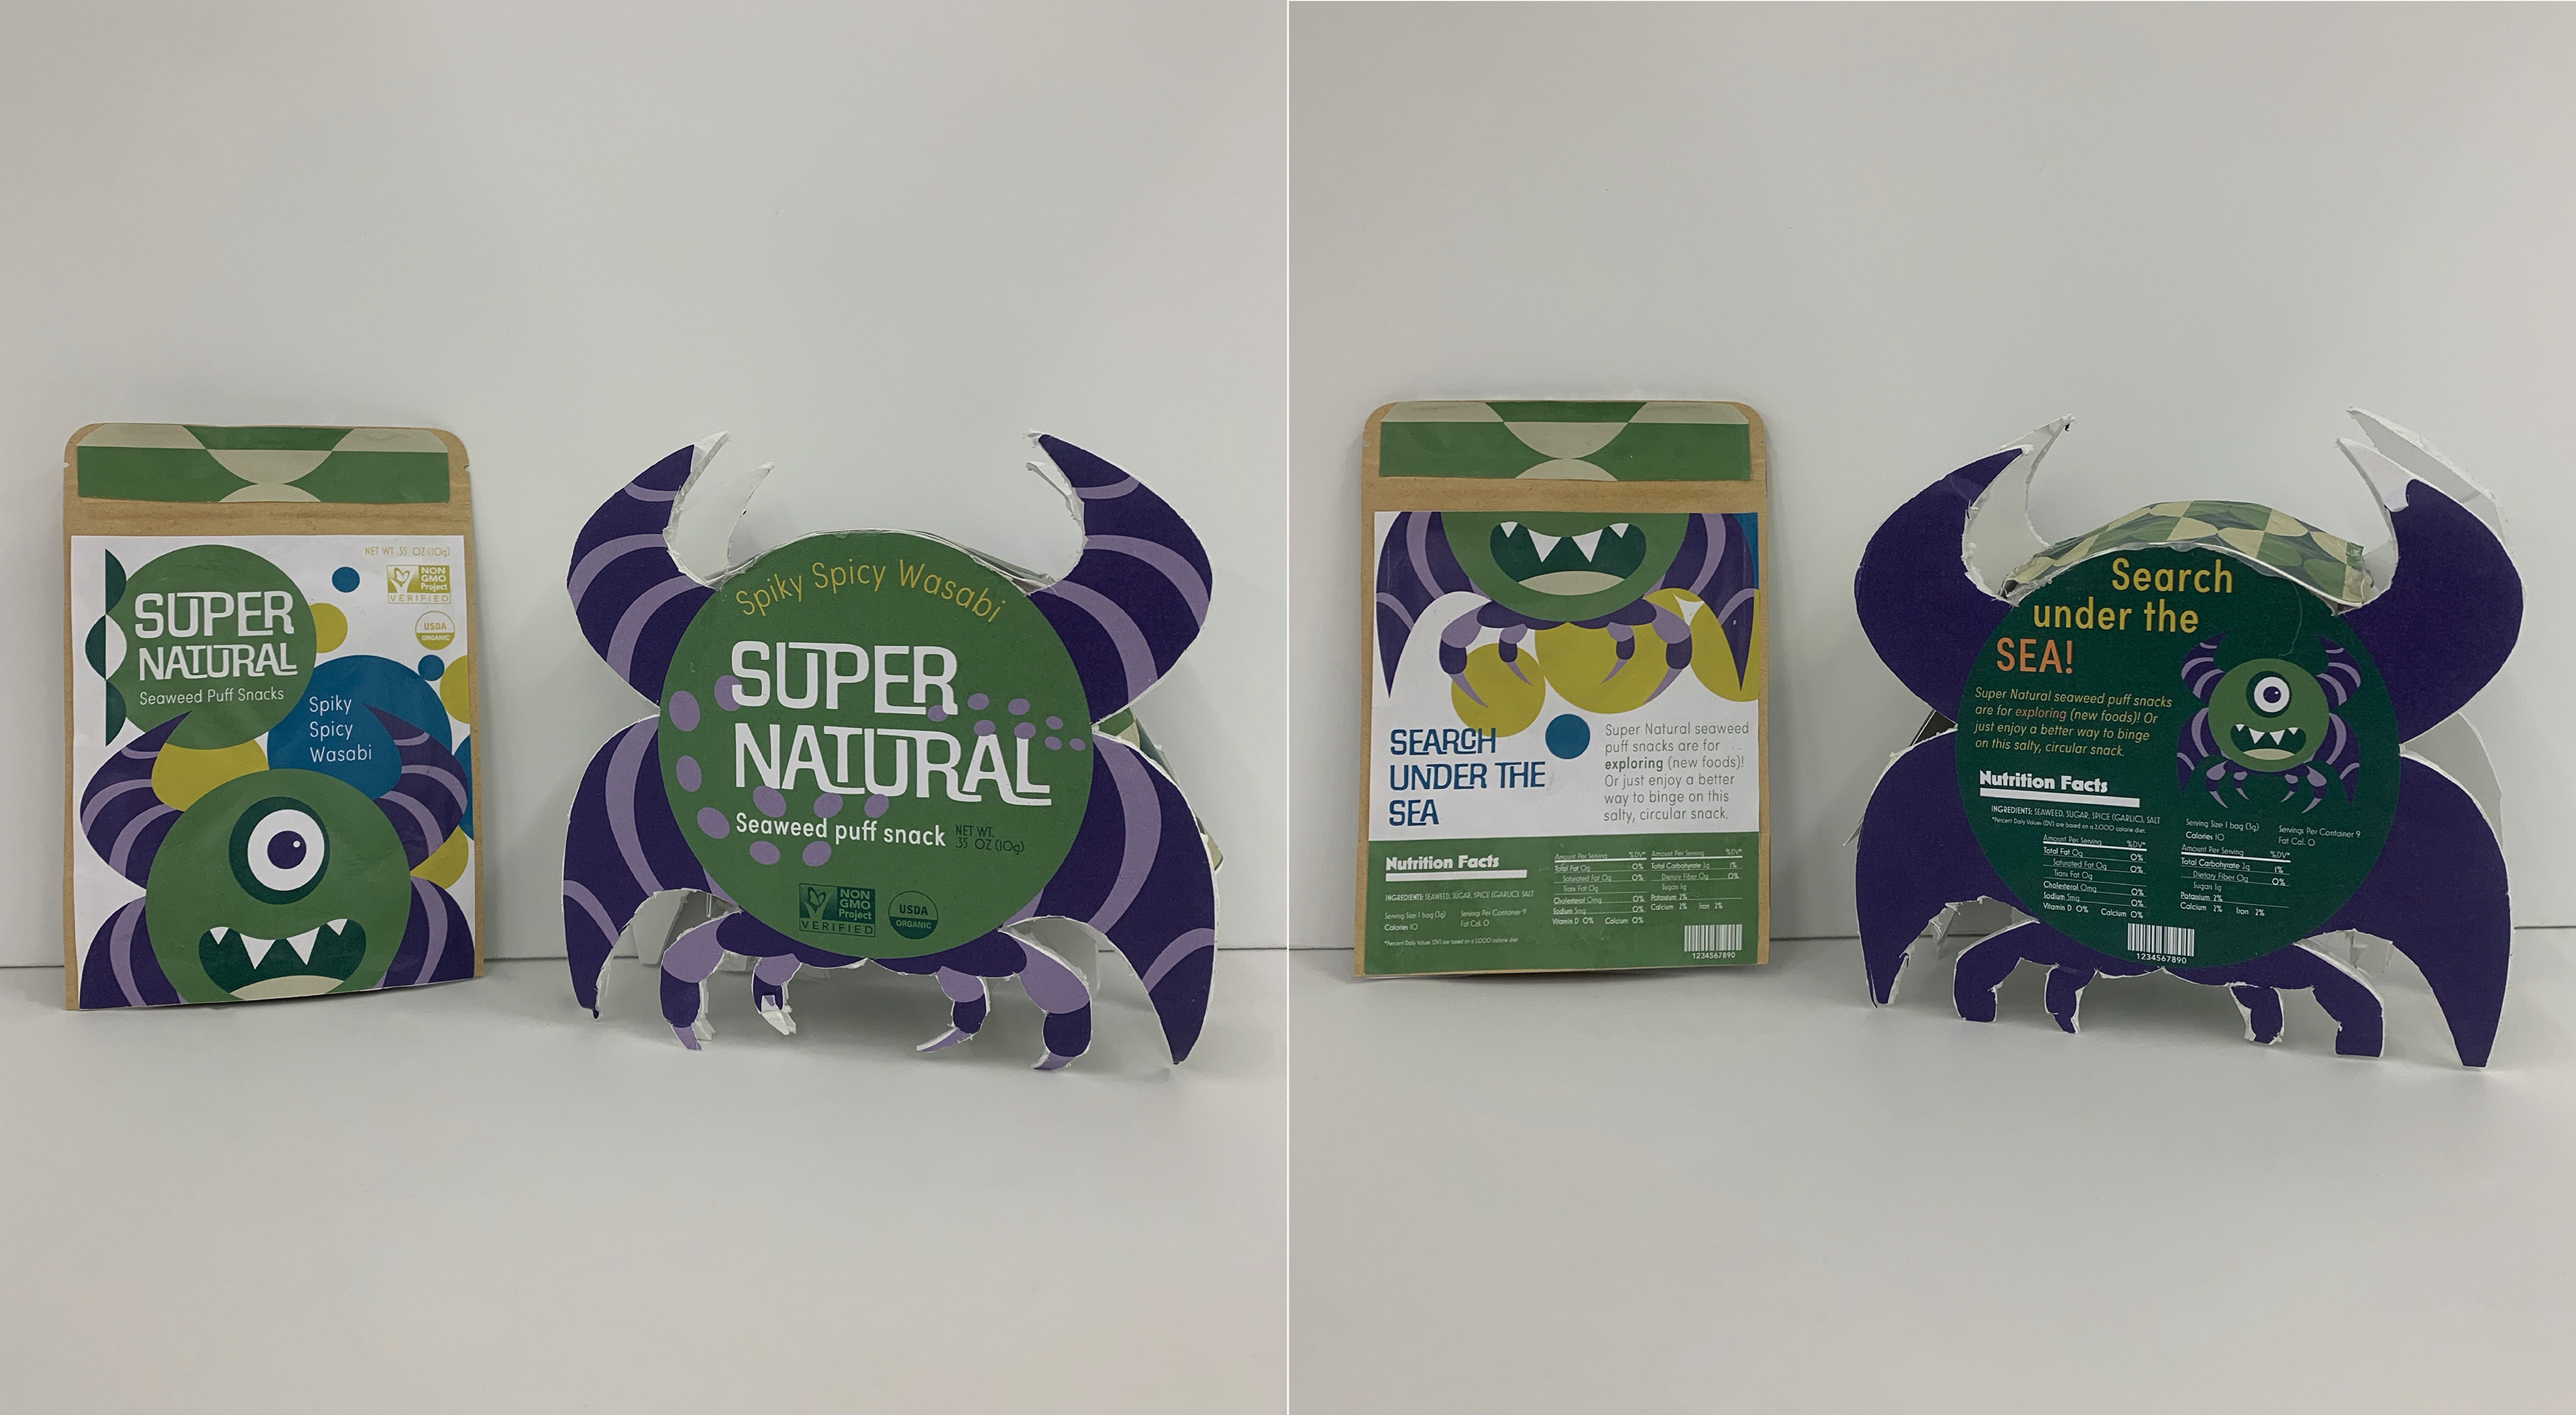
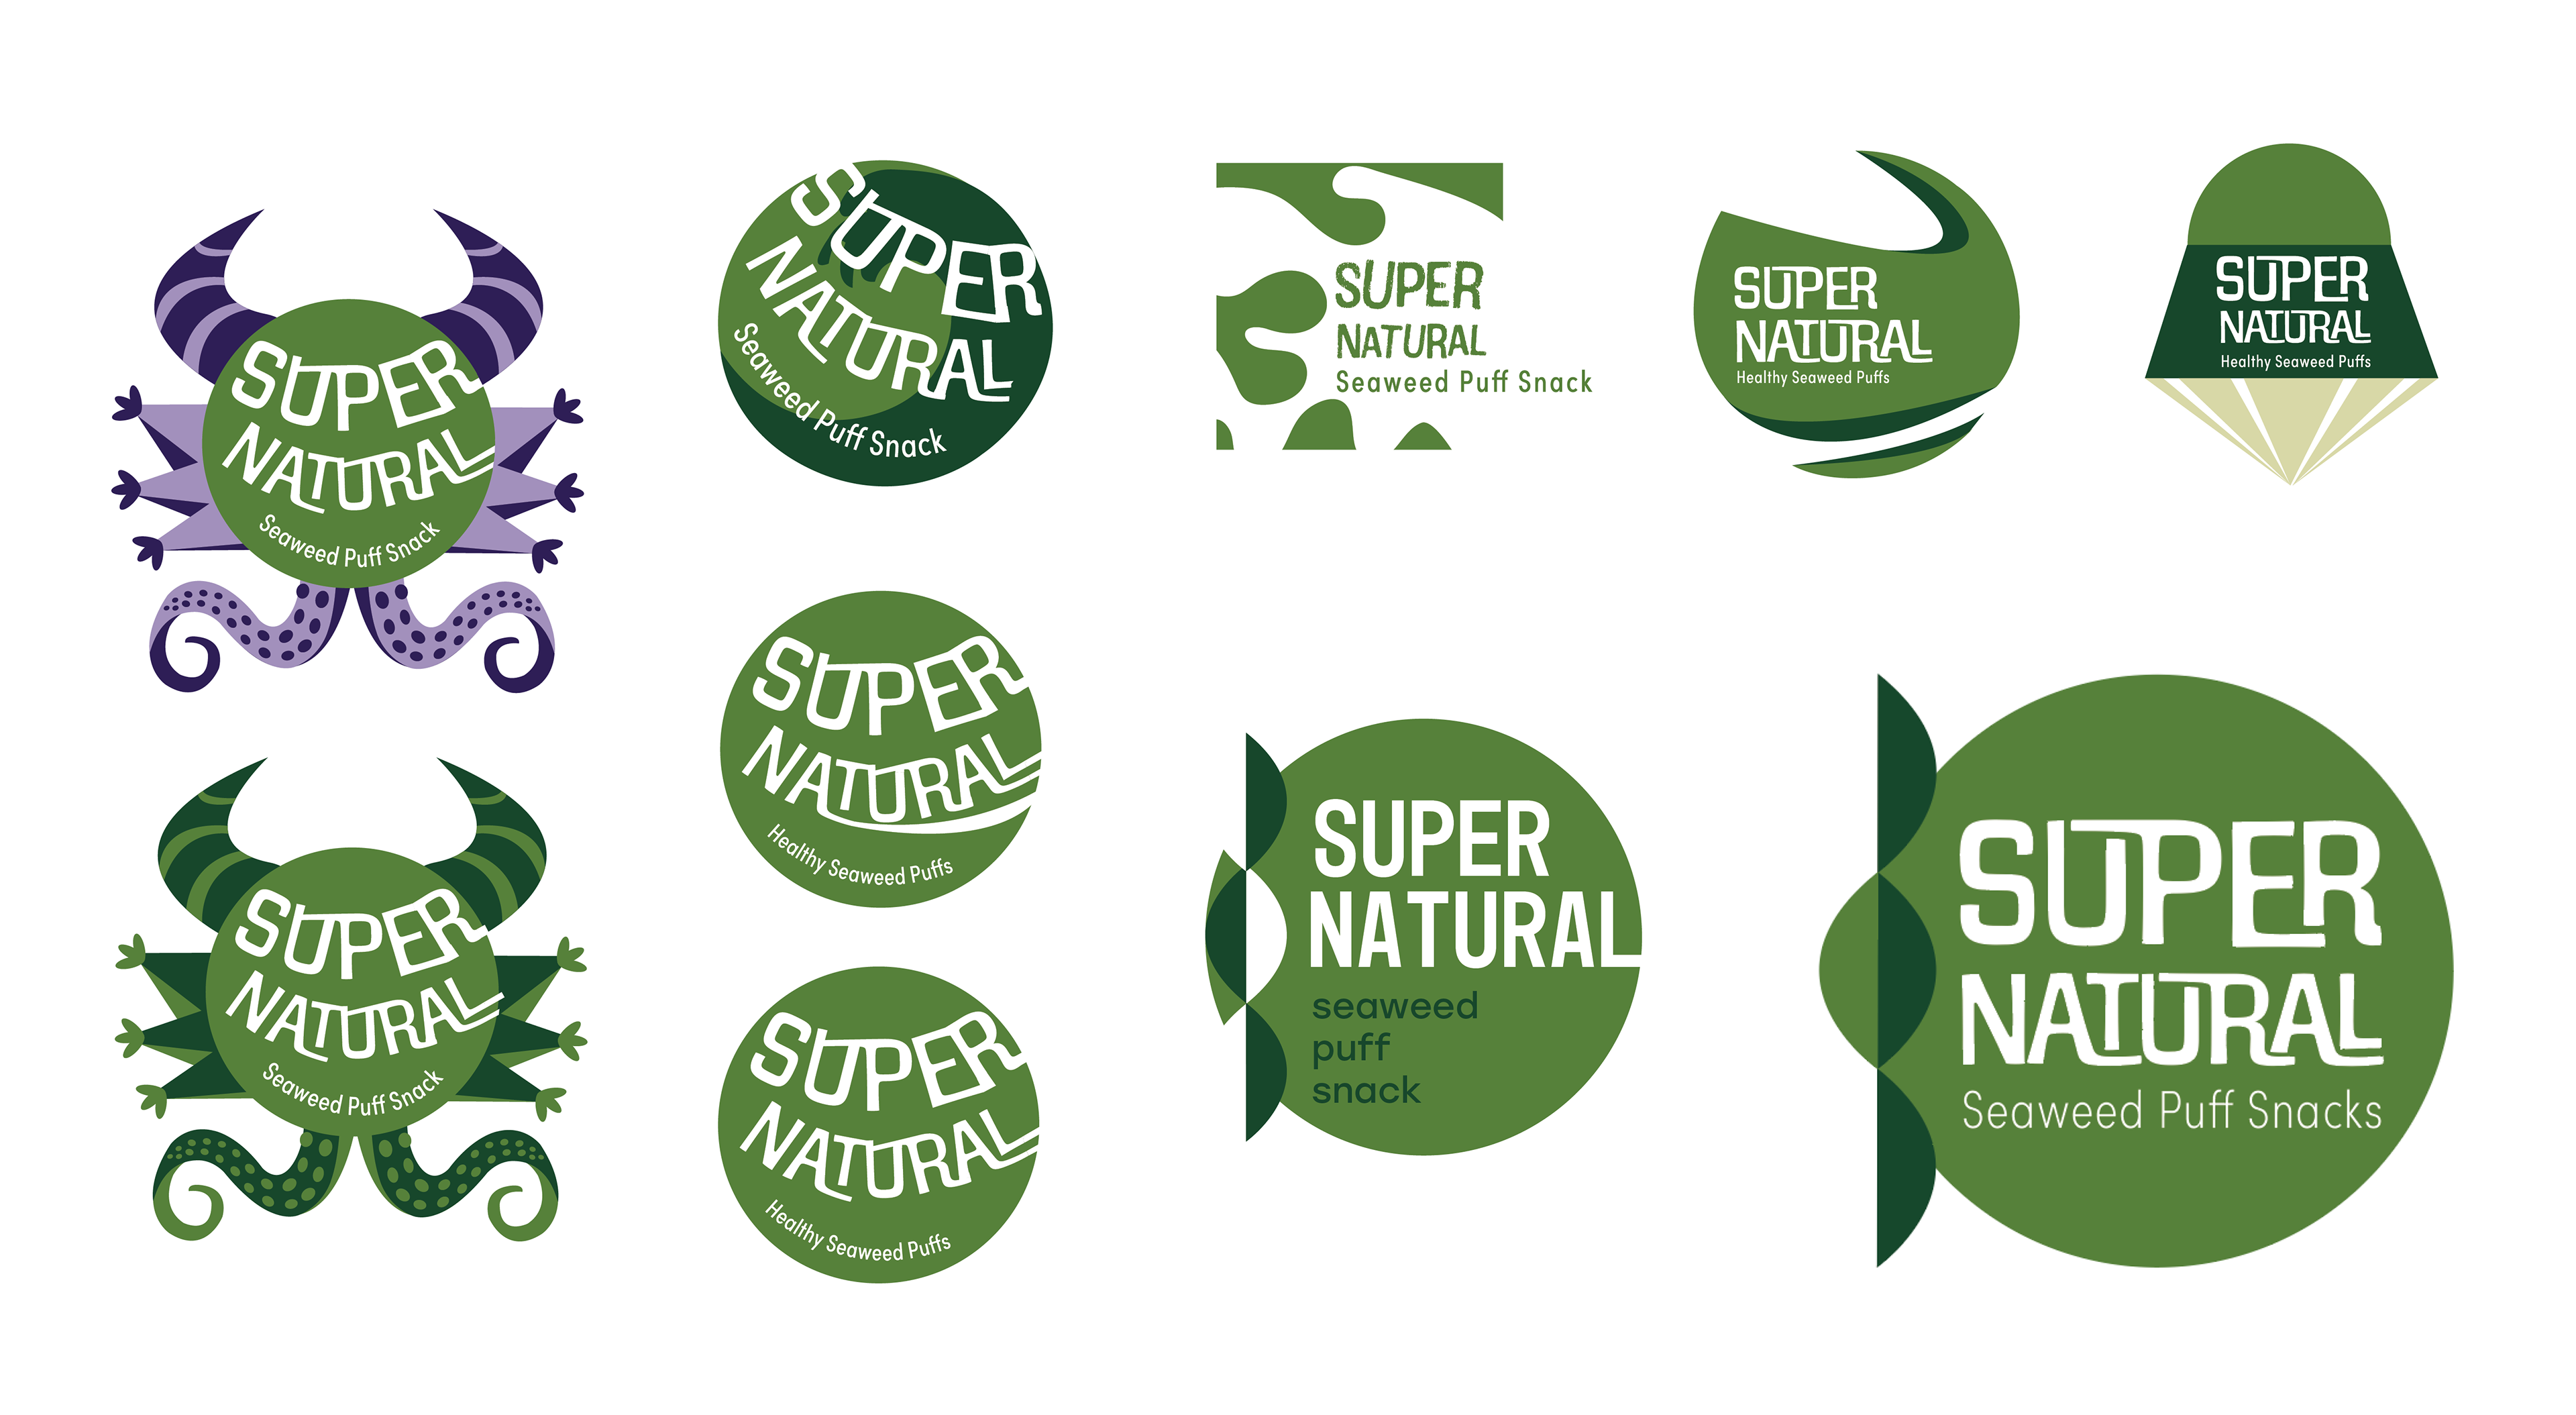
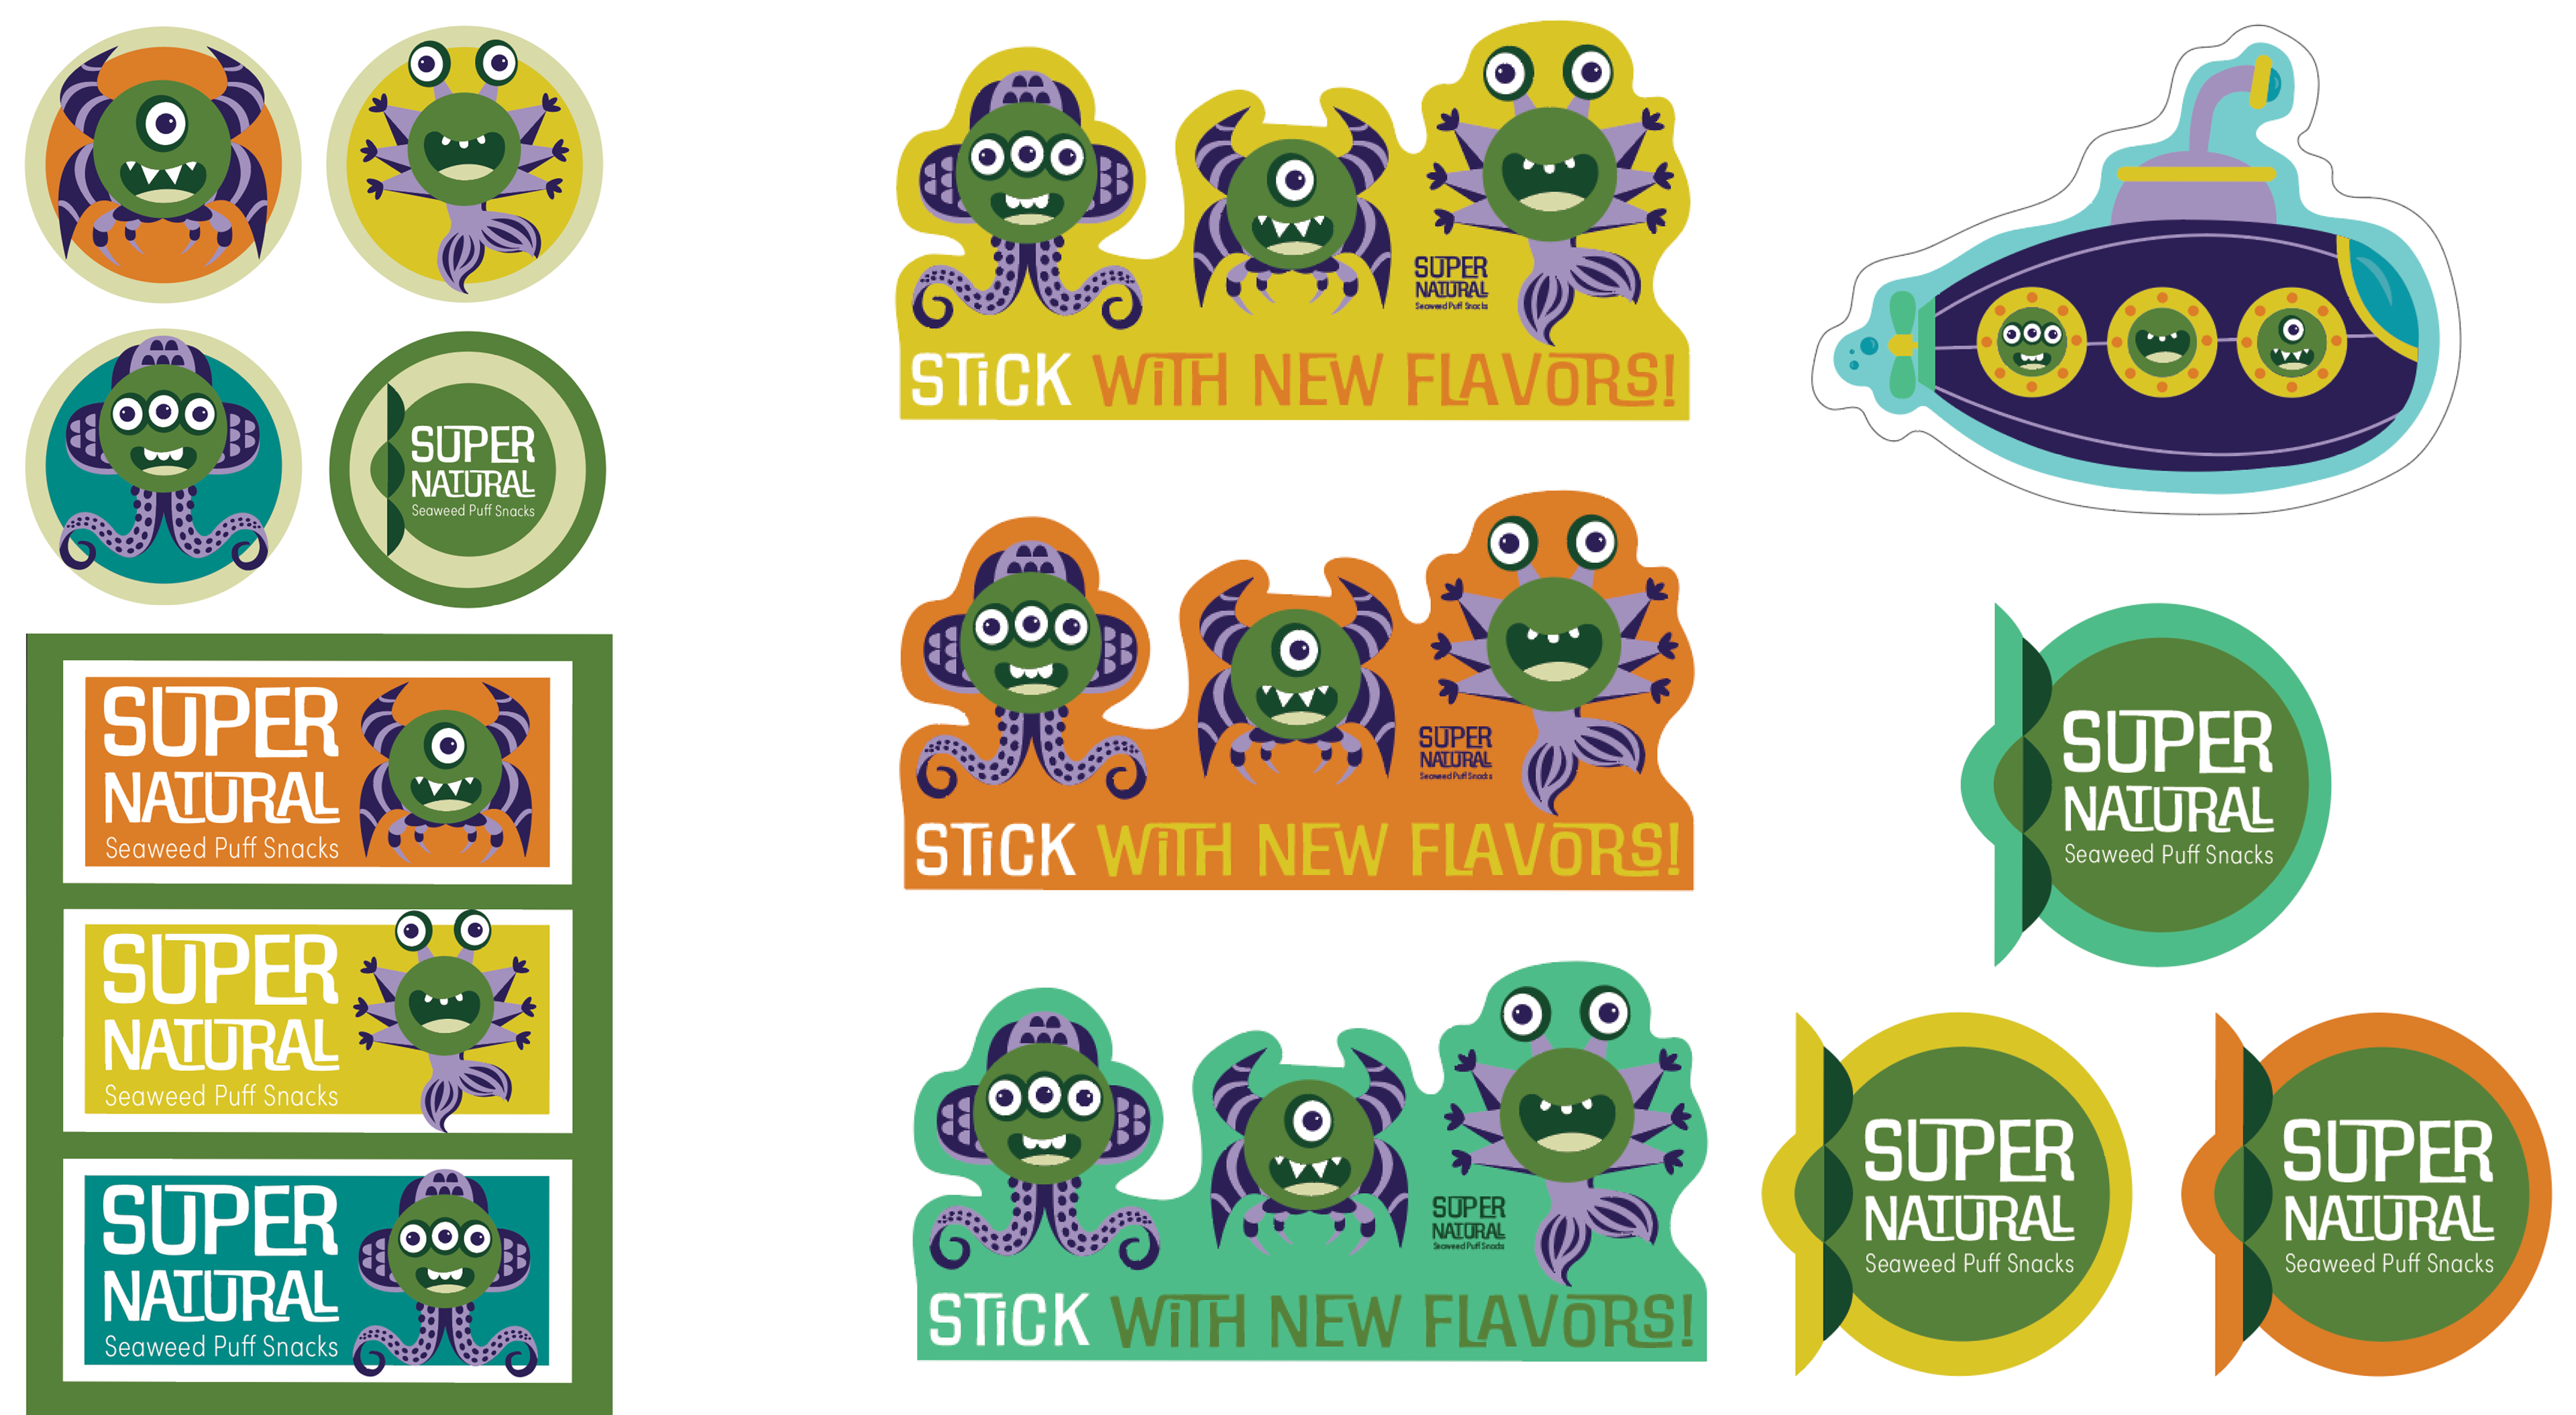
The image below are two rough prototypes of packages I made. The second image below the package prototypes is my logo process with the final logo on the bottom right. The third image below shows the first round of designing stickers on the right and the final on the left.
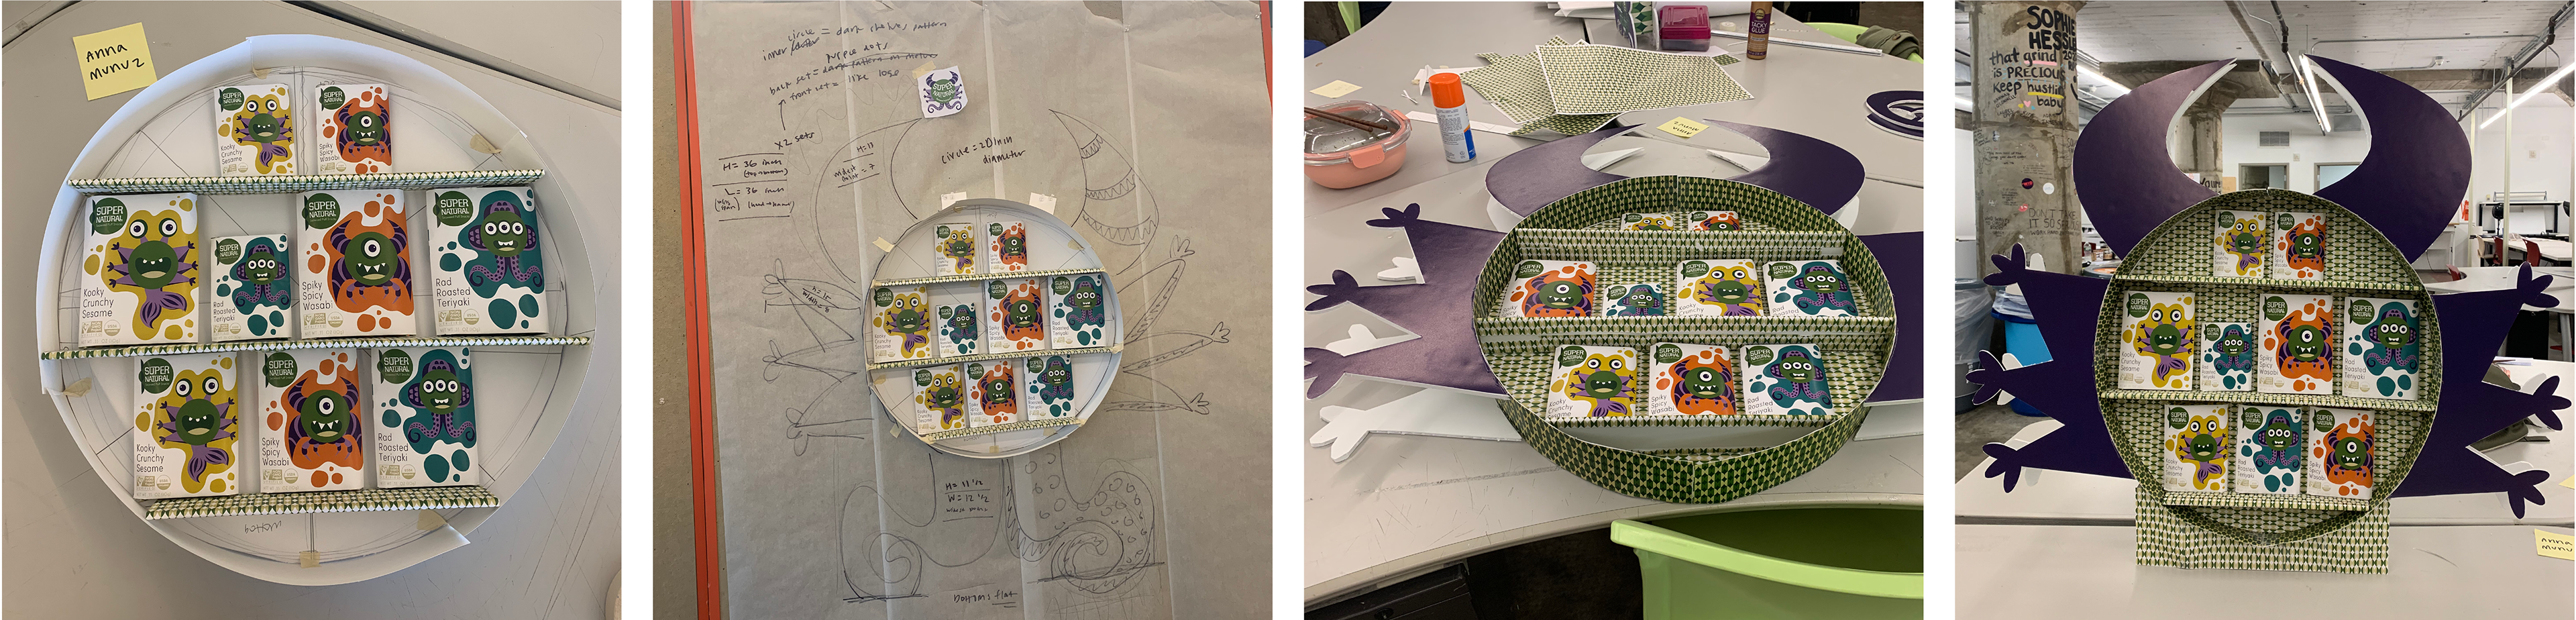
Point of Purchase (P.O.P.) Process
Below are four images from the process of building my point of purchase. I started with using the product packages I had already made and measured them on a circle. I built the shelves and covered them with brand pattern. Then, I put the circle with the product packages on trace paper to figure out measurements and exterior shapes. Finally, I combined illustrative elements I drew for the flavor characters to make a fun and eye catching P.O.P.
Process of a Project
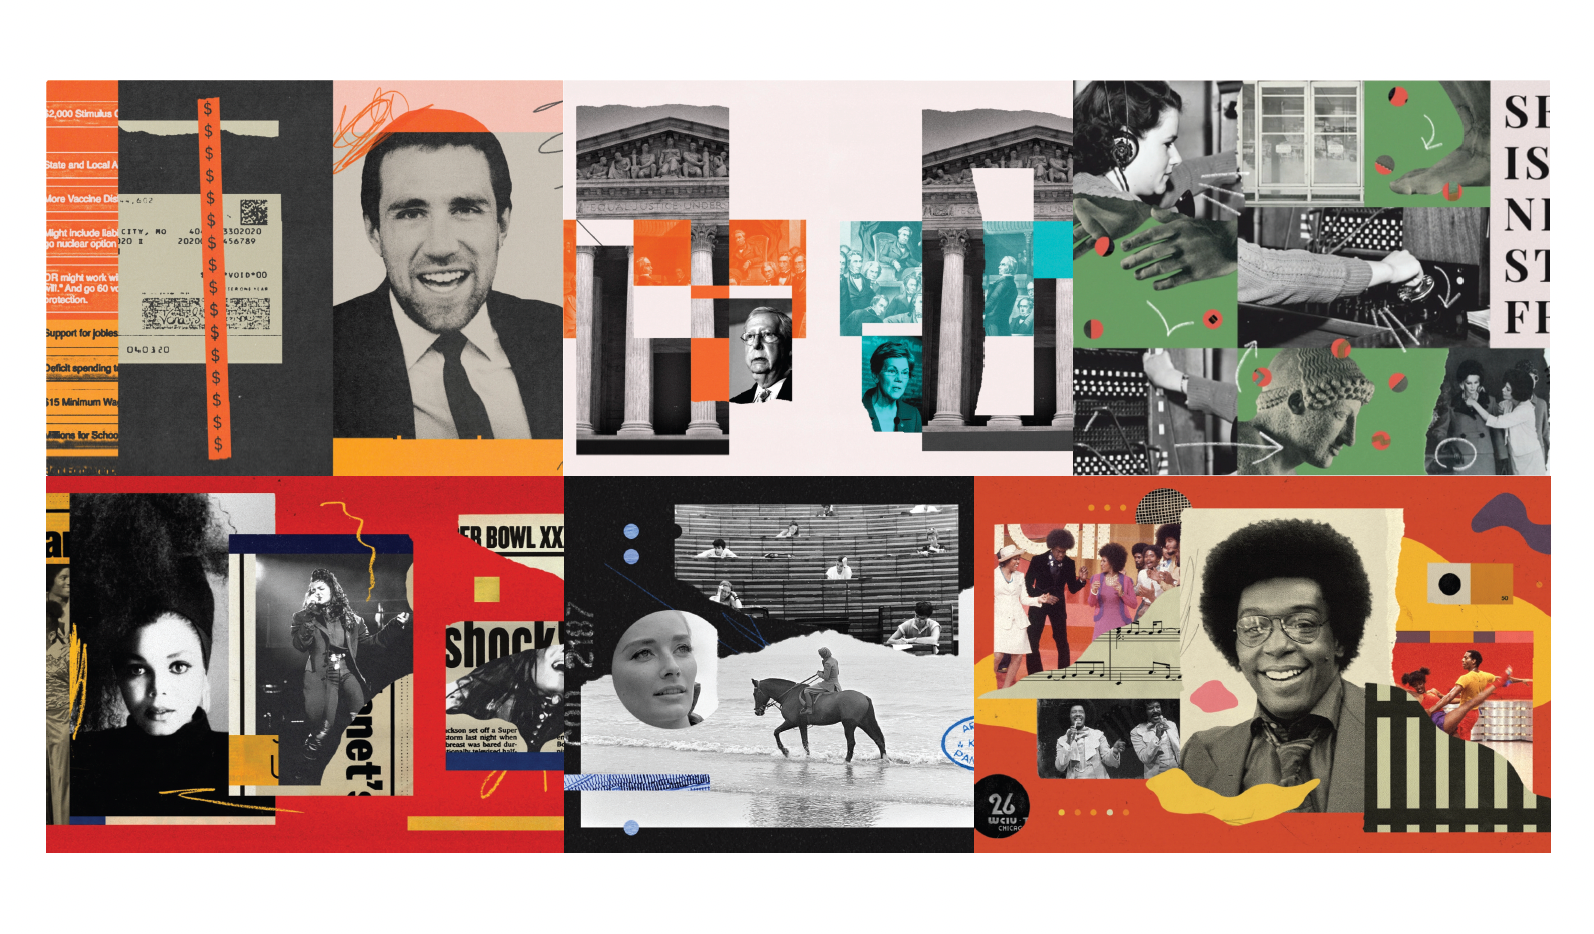
Take a look into creating Groups Unknown Association Awareness Magazine

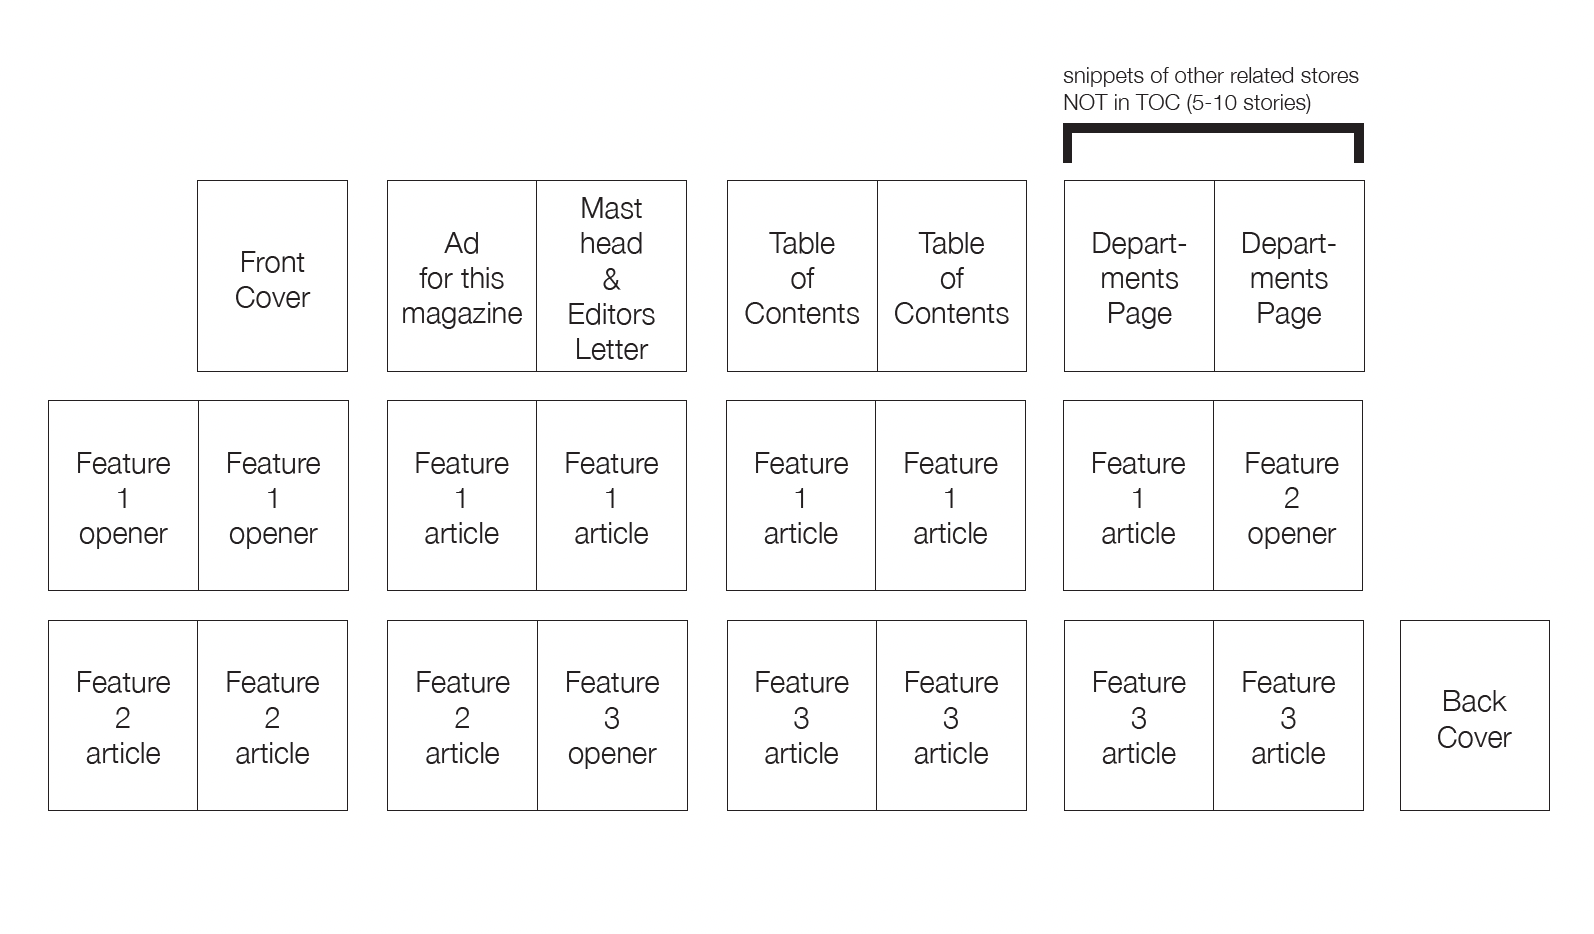
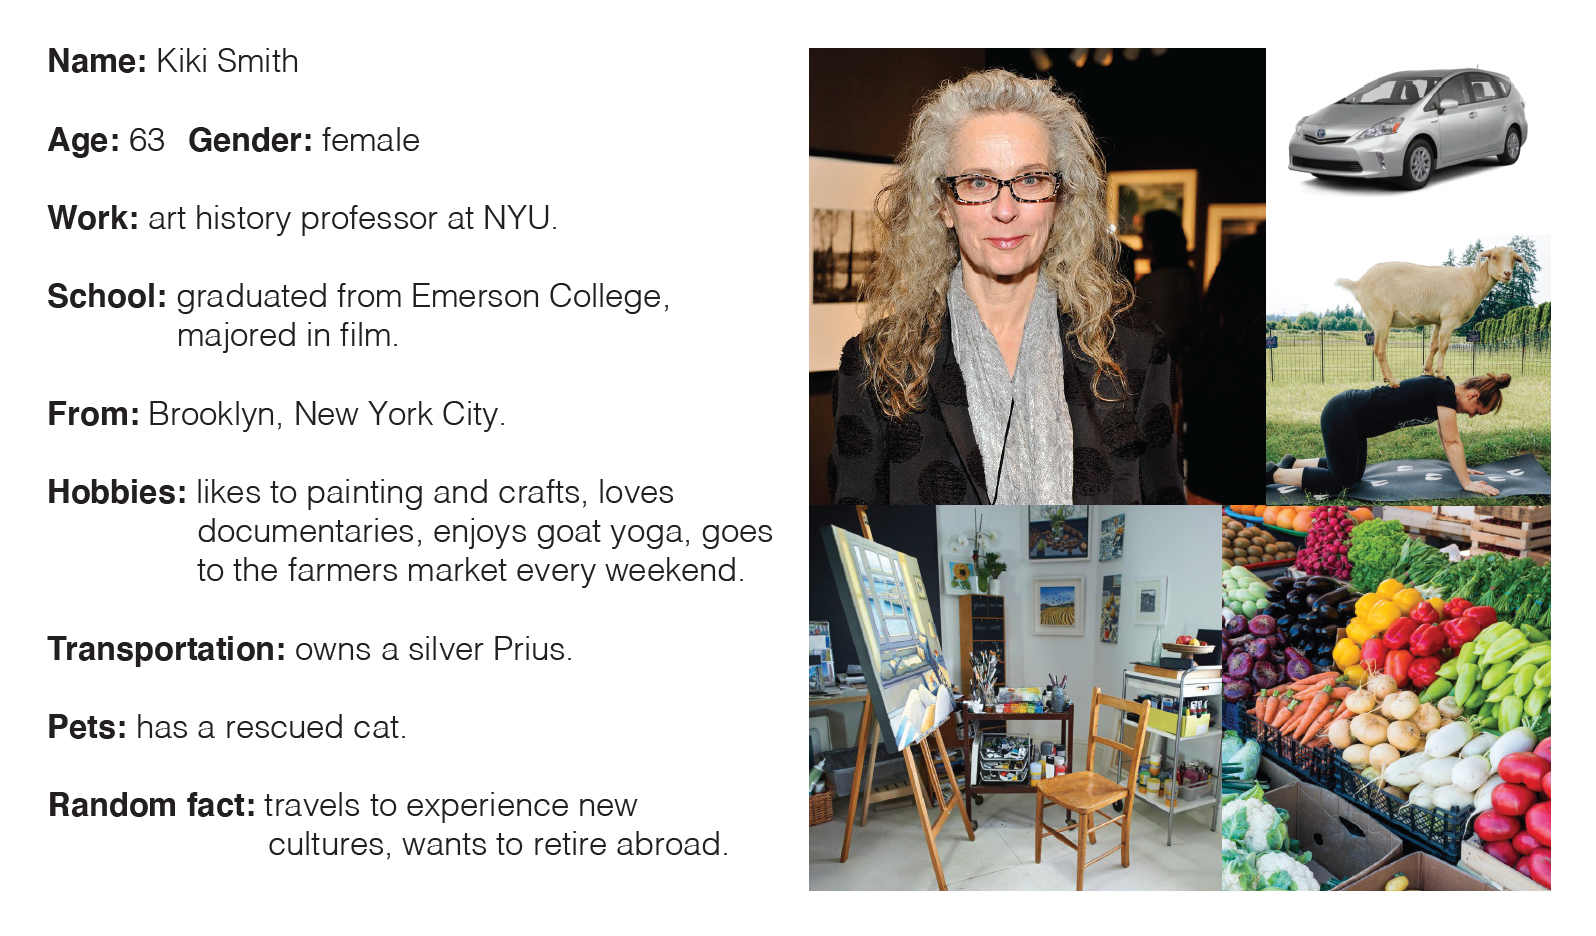
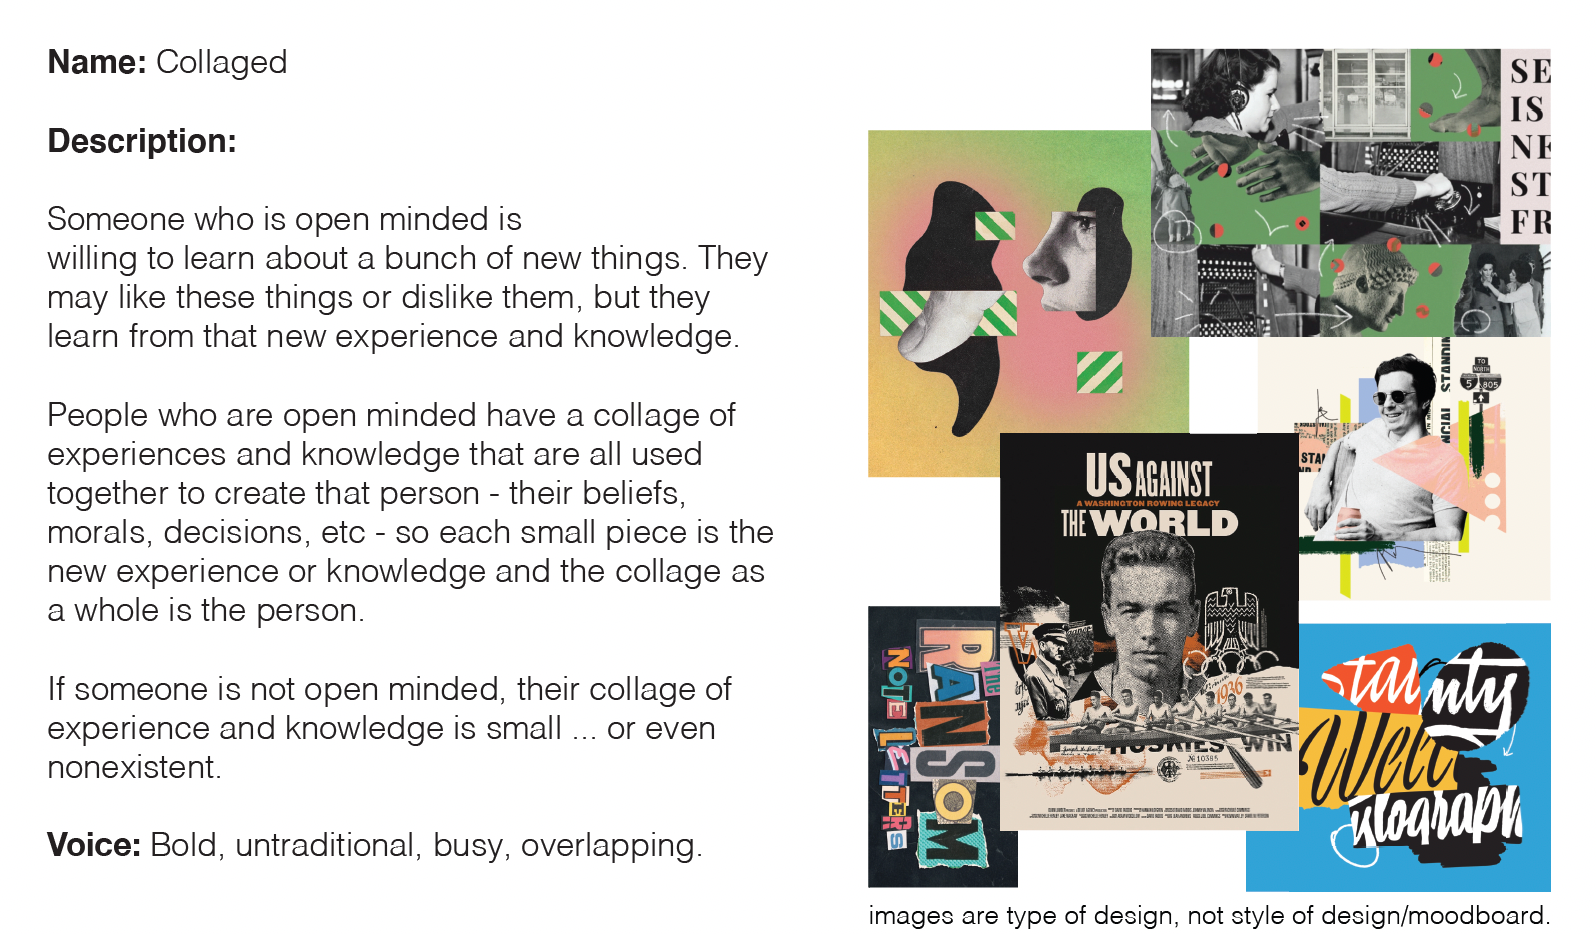
A Quick Glimpse of Creating some Aspects of the Product Backbone: Page schematic (top left image below), audience profile (top right), design concept and mood board (bottom two).
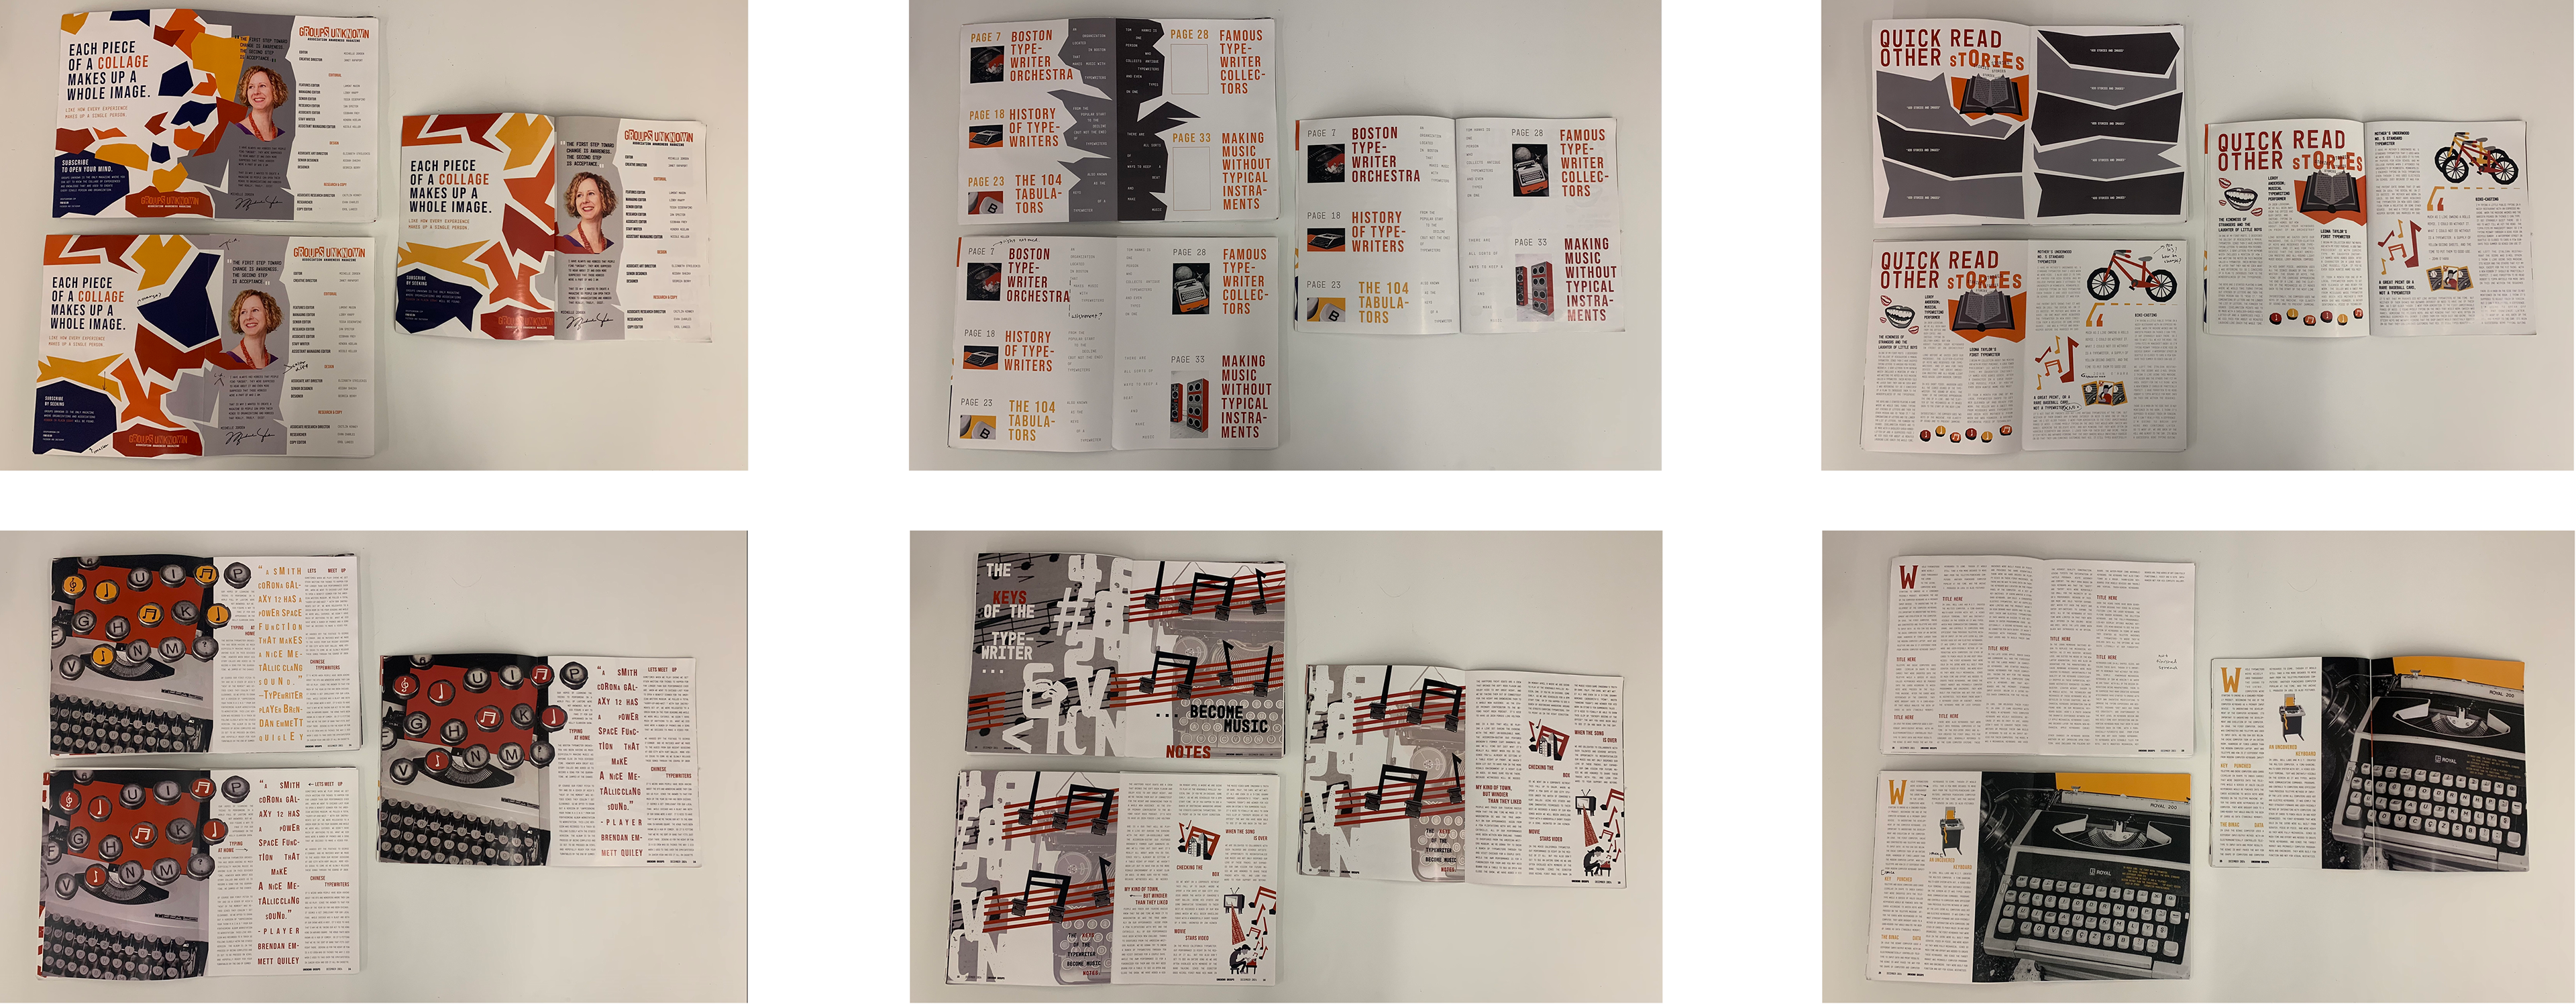
A Quick Glimpse of Prototyping and Editing: I created two versions of my magazine at two more complete stages, and then printed a final version. The top left magazine is the first version, the bottom left is the second version with edits I wrote, and the right magazine is the final.
Process of a Project
Take a quick look into creating John Adams Cider

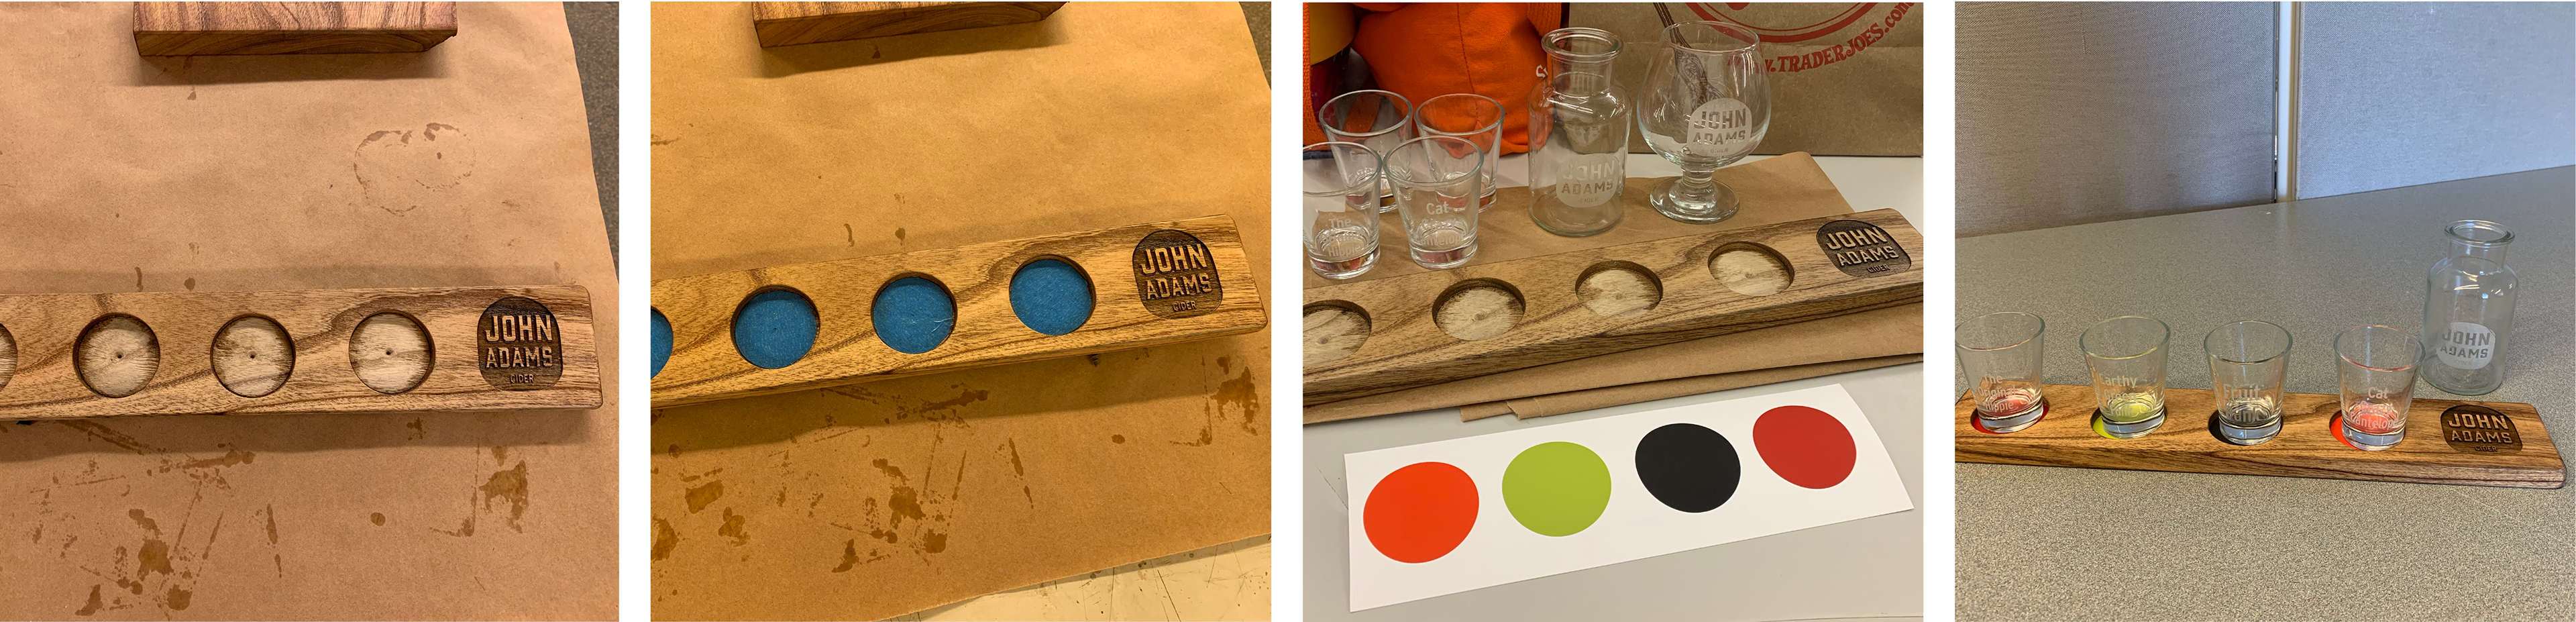
A Quick Glimpse of Prototyping: Cider flight tray in the wood shop and engraved glassware labeled with the flavors and cups and a 12-ounce pour with the logo.
Below are four images from the process of creating the flight tray. First I got a piece of wood and drew out where I want the logo to be and the four cup holders. I cut out four perfect circles and got the logo laser engraved on the right side of the tray. Then, I sanded and oiled the tray which gave the wood a beautiful finish. Also, since I have four flavors of cider featured on this tray, I got four small glasses and engraved the flavor names on each. I printed colored stickers stickers that corresponded with each flavor and put it in the cup holders, to match the flavor and color.
Process of a Project
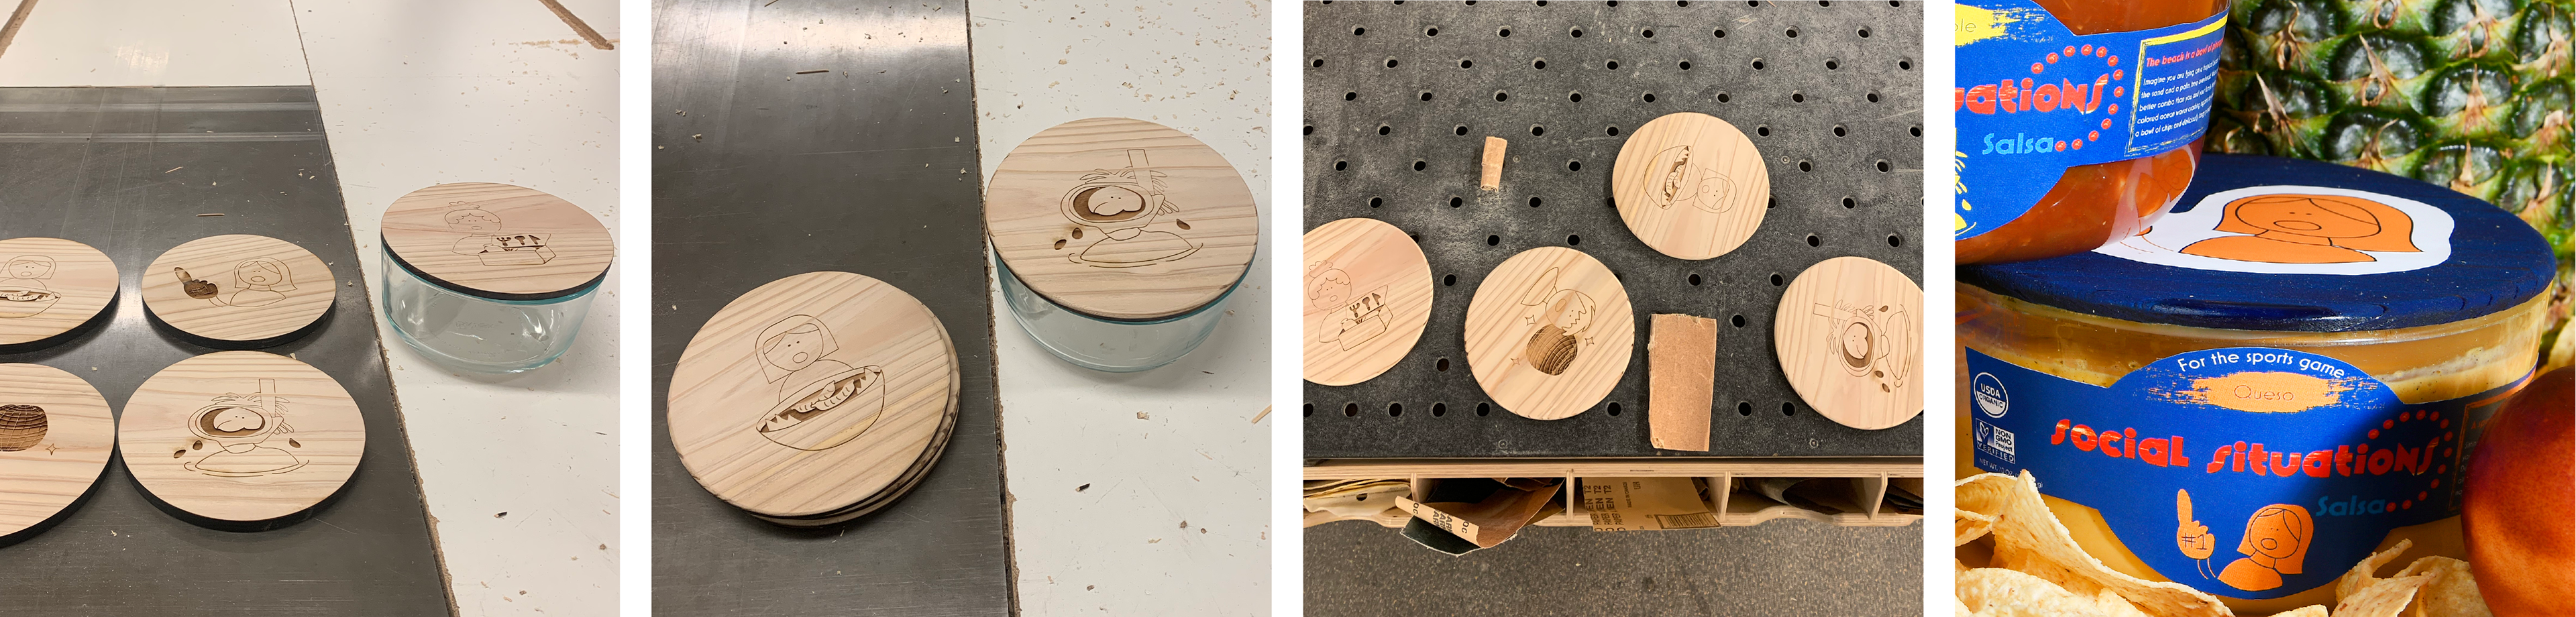
Take a quick look into creating Social Situations Salsa
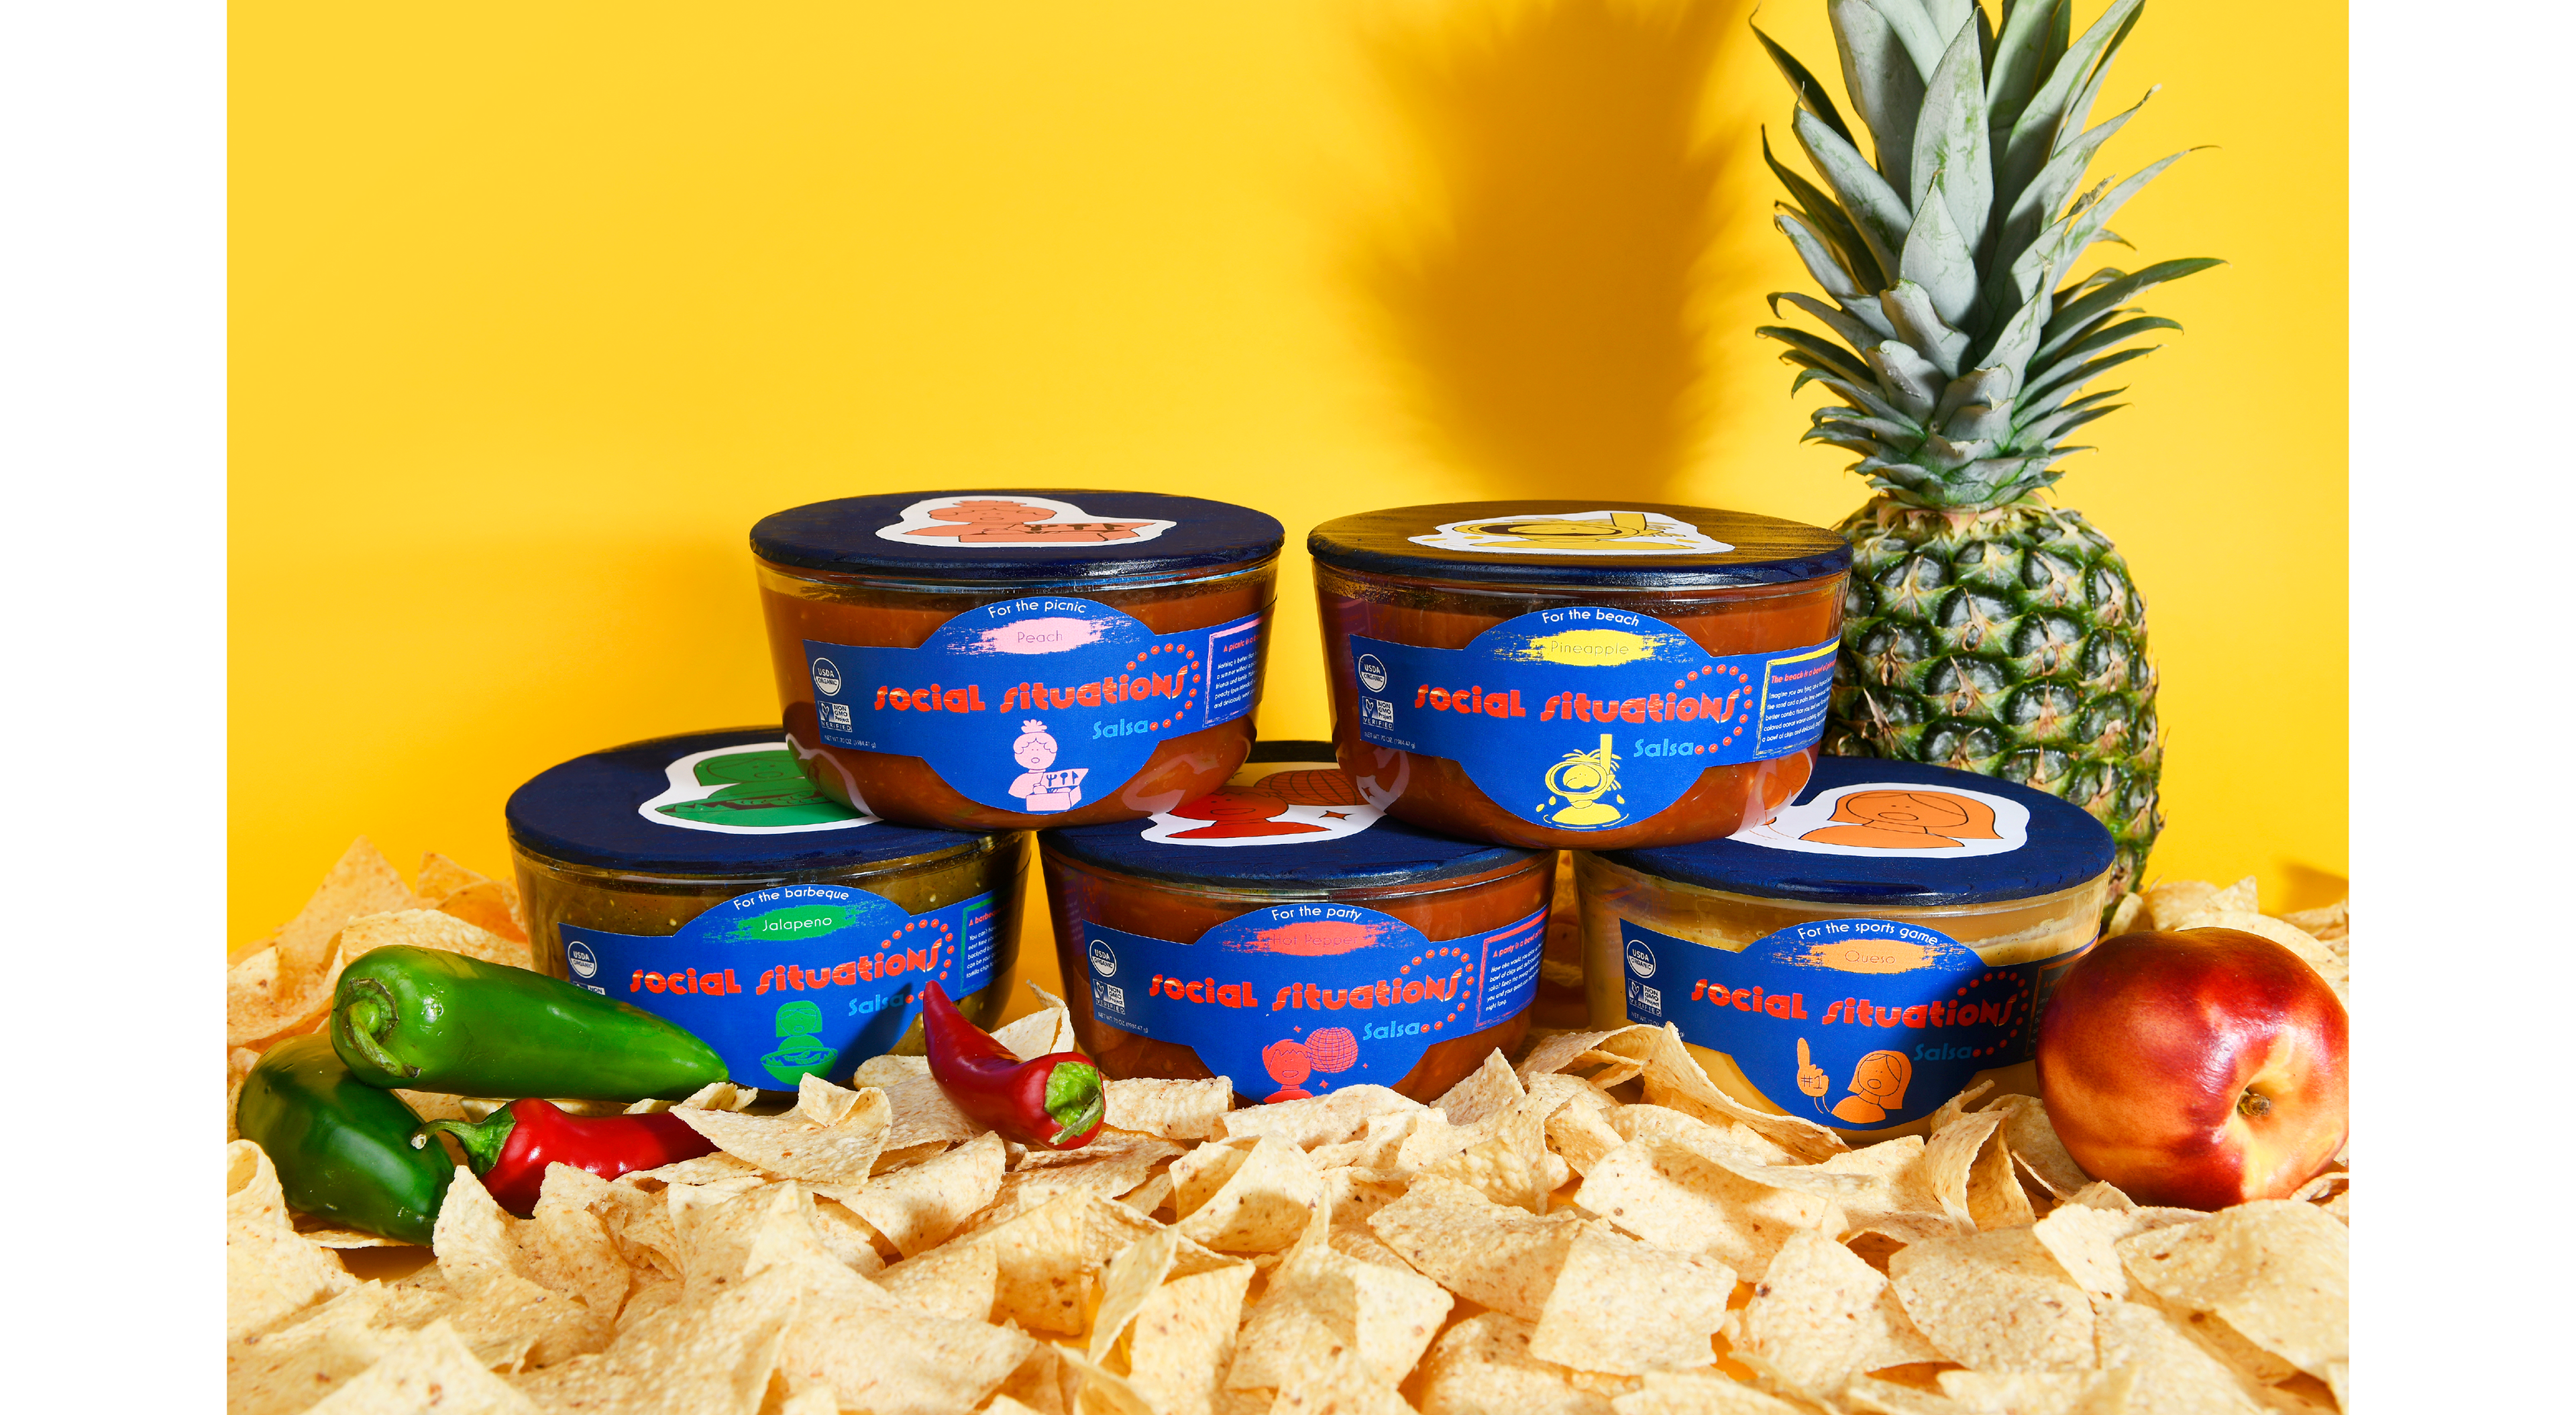
A Quick Glimpse of Prototyping: Wooden lids with the flavor characters.
Below are four images from the process of creating wood lids for each salsa flavor with the character that corresponds to the flavor. I one large piece of wood and drew six circles. I cut out the circles (left image below), rounded the corners (image second from the left), and sanded them (third image from the left). Then, I laser engraved the characters onto the circles and oiled the wood however, I did not like the outcome of the laser engraver with the oil because the wood made the streaks in the wood contrast so much you could barely see the image. So, I improvised and spray painted the lids blue to match the brand color and printed stickers of the characters to stick on top.
I eventually edited the stickers off the lids because I was not expecting the background to be white.
I eventually edited the stickers off the lids because I was not expecting the background to be white.